DOC AI Cam: Manual
DOC AI Cam: Thermal camera manual
4.1 Installing a SIM (optional)
4.4 Create an account on the Cacophony Portal
4.8 Connect to a WiFi network and testing your modem
4.8.1 Checking your modem is working
4.9 Assign your camera to a group.
4.10 Confirm the camera is working
6.1 Uploading recordings using the Sidekick app
7 Accessing recordings and analysing the data
7.2 Tracks, tags and artificial intelligence
7.2.2.1 Creating new tag buttons
7.7 Giving others access to your recordings
10 User agreement for data storage and privacy
12.1 Sidekick won’t connect to my camera
12.2 What if I see blank images
12.3 Access to device is being forced
12.4 Device not registered to same API as user
12.5 User does not have permissions to access this device or its group ([Group name])
12.6 Camera recording at strange times
13.1 Can I export the data to a spreadsheet?
13.2 Can I tag a video as interesting?
13.3 Could my batteries catch fire?
13.4 I forgot to update the location - can I change this later?
13.5 My camera rattles - is it okay?
13.6 What is the clicking I hear?
13.7 How do I charge the battery?
13.9 What do the colours of the light mean?
13.10 Can I connect to the camera with an iPhone?
13.12 Can I change the recording time?
13.13 How do I manage my camera batteries?
13.14 How do I reset my password?
13.15 Why do I get an email titled “Stopped Devices”?
13.15 Can I change my display name?
13.16 How to navigate to a station page
13.18 What is the algorithm for calculating a visit?
13.19 My SIM card isn’t working
13.20 When are recordings uploaded in low power mode?
Videos
1 Safety
The DOC AI Cam is designed for safe outdoor use. However there are a few precautions you should take when using the camera and some simple maintenance to extend its operating life.
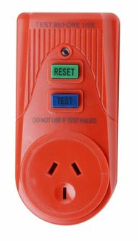
If using mains power then please use an residual current device (RCD), such as this
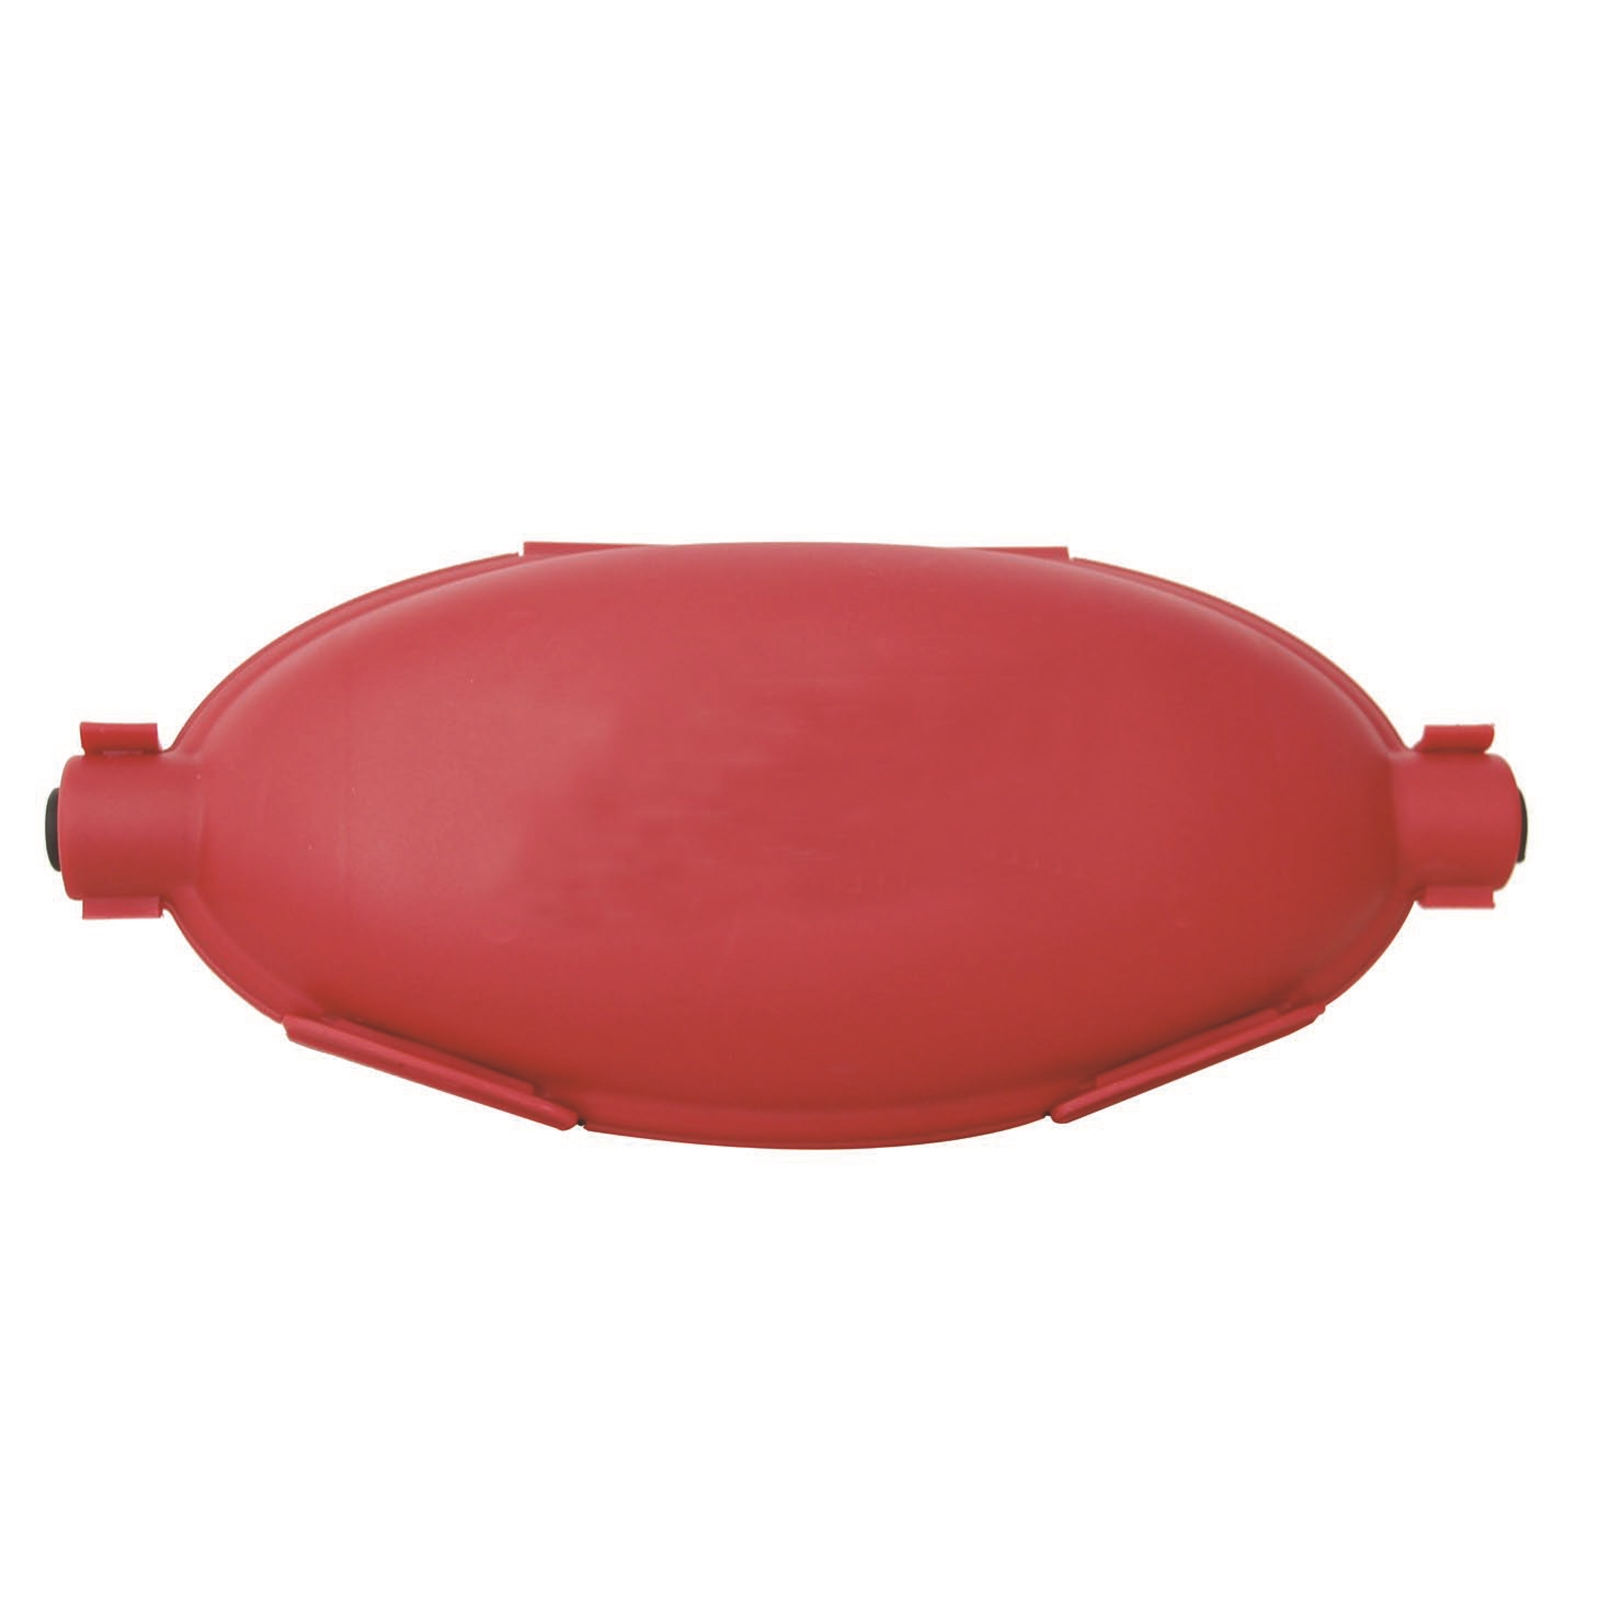
Also use a lead safety box for connecting any extension cord to the power supply and ensure it is placed in a position where water will not pool.
Waterproofness
The camera is waterproof and designed to operate in heavy rain. Please do not submerge or leave sitting in pools of water.
The following steps will help ensure that the camera remains watertight.
-
From time to time check that the 8 screws on the back of the camera are tight.
-
Make sure the power connection clicks in when you connect it.
-
If you noticed the plastic covering over the square lens or green button has come loose or is damaged then please stop using the camera and contact support@2040.co.nz for instructions on how to have the camera repaired.

Battery safety
The DOC AI Cam batteries use either Lithium Iron Phosphate (LiFePO4) (rectangular) or Lithium Ion (these are the cylindrical, refurbished Lime batteries) chemistry. The LiFePO4 batteries are the safest type of Lithium batteries as they will not overheat, and even if punctured they will not catch on fire. The cathode material in LiFePO4 batteries is not hazardous, and so poses no negative health hazards or environmental hazards. Due to the oxygen being bonded tightly to the molecule, there is no danger of the battery erupting into flames like there is with Lithium-Ion batteries. Though less energy-dense than the Lithium-Ion and Lithium Polymer, Iron and Phosphate are abundant and cheaper to extract so costs are much more reasonable. LiFePO4 life expectancy is approximately 5-7 years.
The battery is in a waterproof casing rated at IP67. It can withstand heavy rain, but please do not submerge. The batteries have built in short circuit protection.
For transporting the batteries most couriers will not allow them to fly, so they will need to be transported by road, rail or ship. We have found this courier http://www.stuck.co.nz/ can handle the shipment of lithium batteries. The courier may ask for the safety data sheet: MSDS for the Refurbished Lime batteries (UN3481), MSDS for the Lithium Ion Phosphate Batteries
2 Introduction
The DOC AI Cam is designed to automatically record and detect predators. It is more sensitive than other methods, more cost effective and requires less labour. It also will record audio and automatically detect birds. The audio functionality is described in Bird Monitoring Manual.
The DOC AI Cam is designed by The Cacophony Project, a non-profit organisation whose mission is to develop technologies to eradicate predators from New Zealand. The development of this version of the camera was funded by the Department of Conservation. The DOC AI Cam is manufactured and supported by 2040 Limited, a social enterprise whose mission is:
-
To use the technology developed by The Cacophony Project to eradicate all predators of native birds in New Zealand by 2040.
-
To make the technology available to similar projects globally
-
To financially support The Cacophony Project
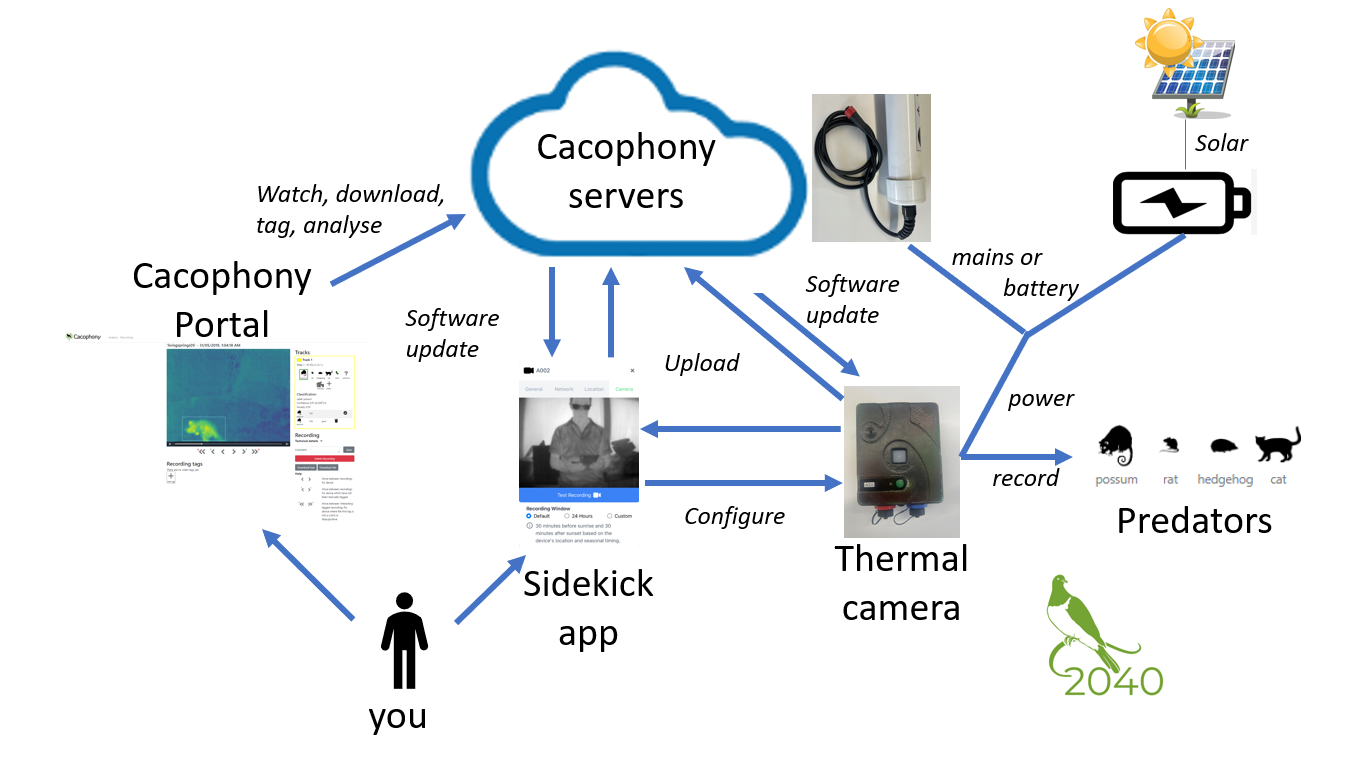
In the default mode, Thermal video recordings are made when movement is detected, stored locally and uploaded to the Cacophony servers, where they are analysed using machine vision algorithms to determine what, if any predators were present in the videos. You can log onto the Cacophony Portal, view and download the videos, add your own tags and notes and see and export summaries of the data.
3 The parts of the system
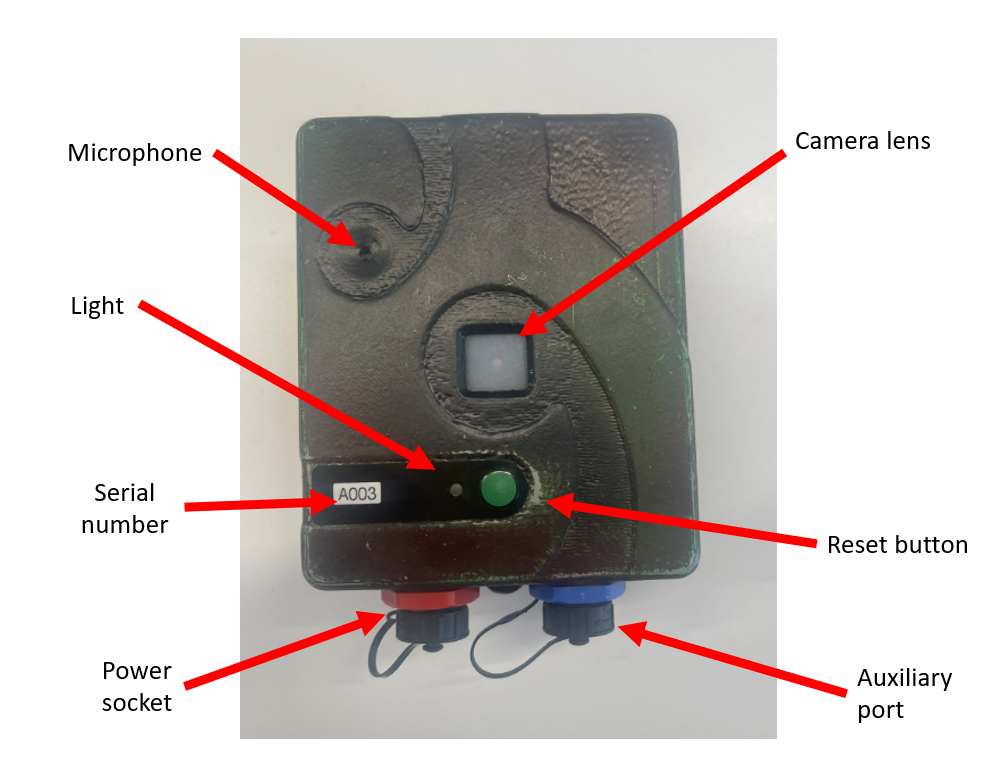
The parts of the camera
The camera can be powered by
-
a battery (sold separately) - which is charged by an AC charger
-
Solar, or
-
From the mains.
The recorded videos are uploaded either directly to the Cacophony servers if the camera has a mobile or WiFi connection, or via the Sidekick app on a mobile phone, which in turn uploads the videos to the Cacophony Project's servers when it has a mobile or WiFi connection. The Sidekick mobile app is also used to configure the camera. The Cacophony Portal is used to watch, download, tag and analyse the videos.
Software updates are delivered from time to time to the camera, the sidekick app and the Cacophony Portal.
4 Setting up the camera
These are the steps for setting up the camera. You should do this when you first receive the camera in your home or office. Each of these are described in detail below.
-
Installing a modem and SIM (optional)
-
Mounting the camera - to a tripod, strapping or screwing it in.
-
Connecting power
-
Creating an account
-
Creating a group
-
Installing the sidekick app
-
Connecting to the camera
-
Setting the location and name
-
Creating a camera name and associate with a group
-
Connecting to your local WiFi (optional)
-
Confirming the camera is working
-
Testing an upload
4.1 Installing a SIM (optional)
If the area where you will be monitoring predators has mobile network coverage and your camera does not already have a modem then you can please contact us for instructions on how to install a modem. Note that operation with a modem does use significantly more power. If you are using a modem and powering your camera with a battery, the battery will need to be changed more often.
4.1.1 Inserting a SIM
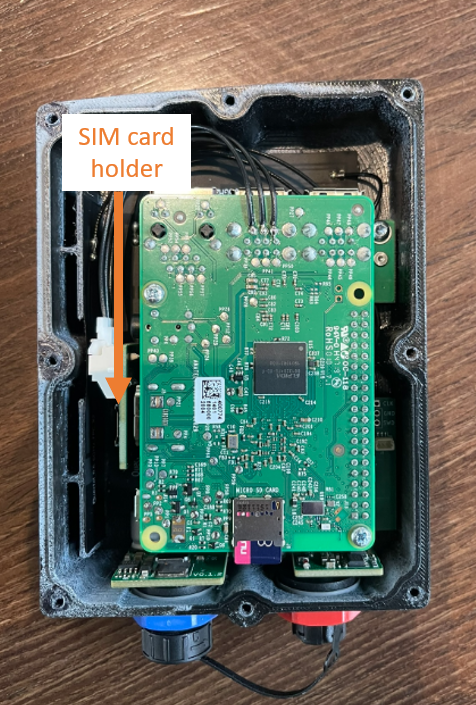
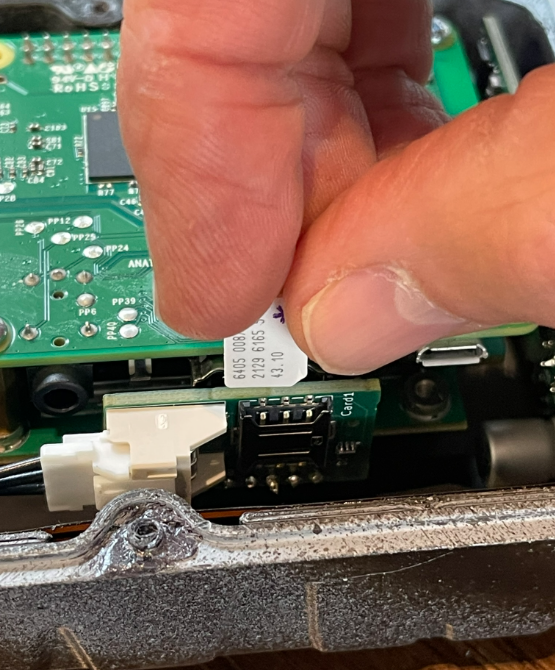
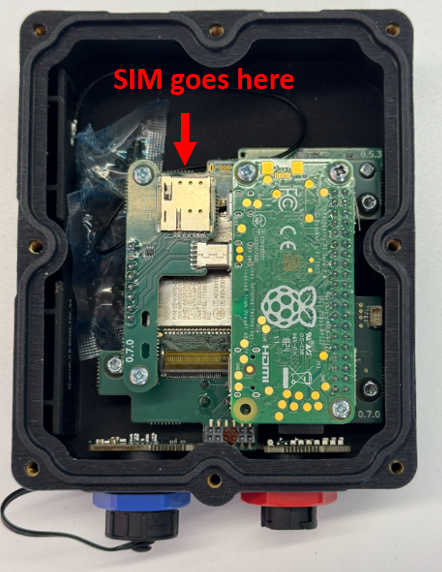
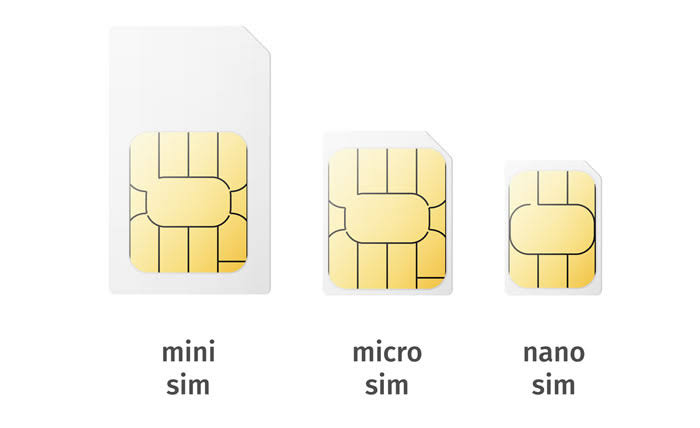
If you are providing your own SIM you can insert this in the modem by inserting it into the SIM card holder as shown below.. There is an image showing the correct orientation of the SIM card. The modem takes a nano SIM (the smallest of the SIMs). Here is a video on how to change the SIM: Installing SIM card and checking modem in DOC AI Cam
Note: There are two versions of the PCB: one with a vertical SIM card holder and one with a horizontal SIM card holder
4.2 Mounting the camera
The camera is not particularly sensitive to the height at which it is mounted, but we recommend about 1 metre off the ground for best results. Ideally pointing down, so that there is no sky in the field of view. The sky is very cold and foliage moving against the background of the sky will be detected as movement, creating a lot of false positives.
Video demonstrating the camera mounting options
There are 3 mounting options for the camera:
-
Tree spike
-
Straps
-
Trip
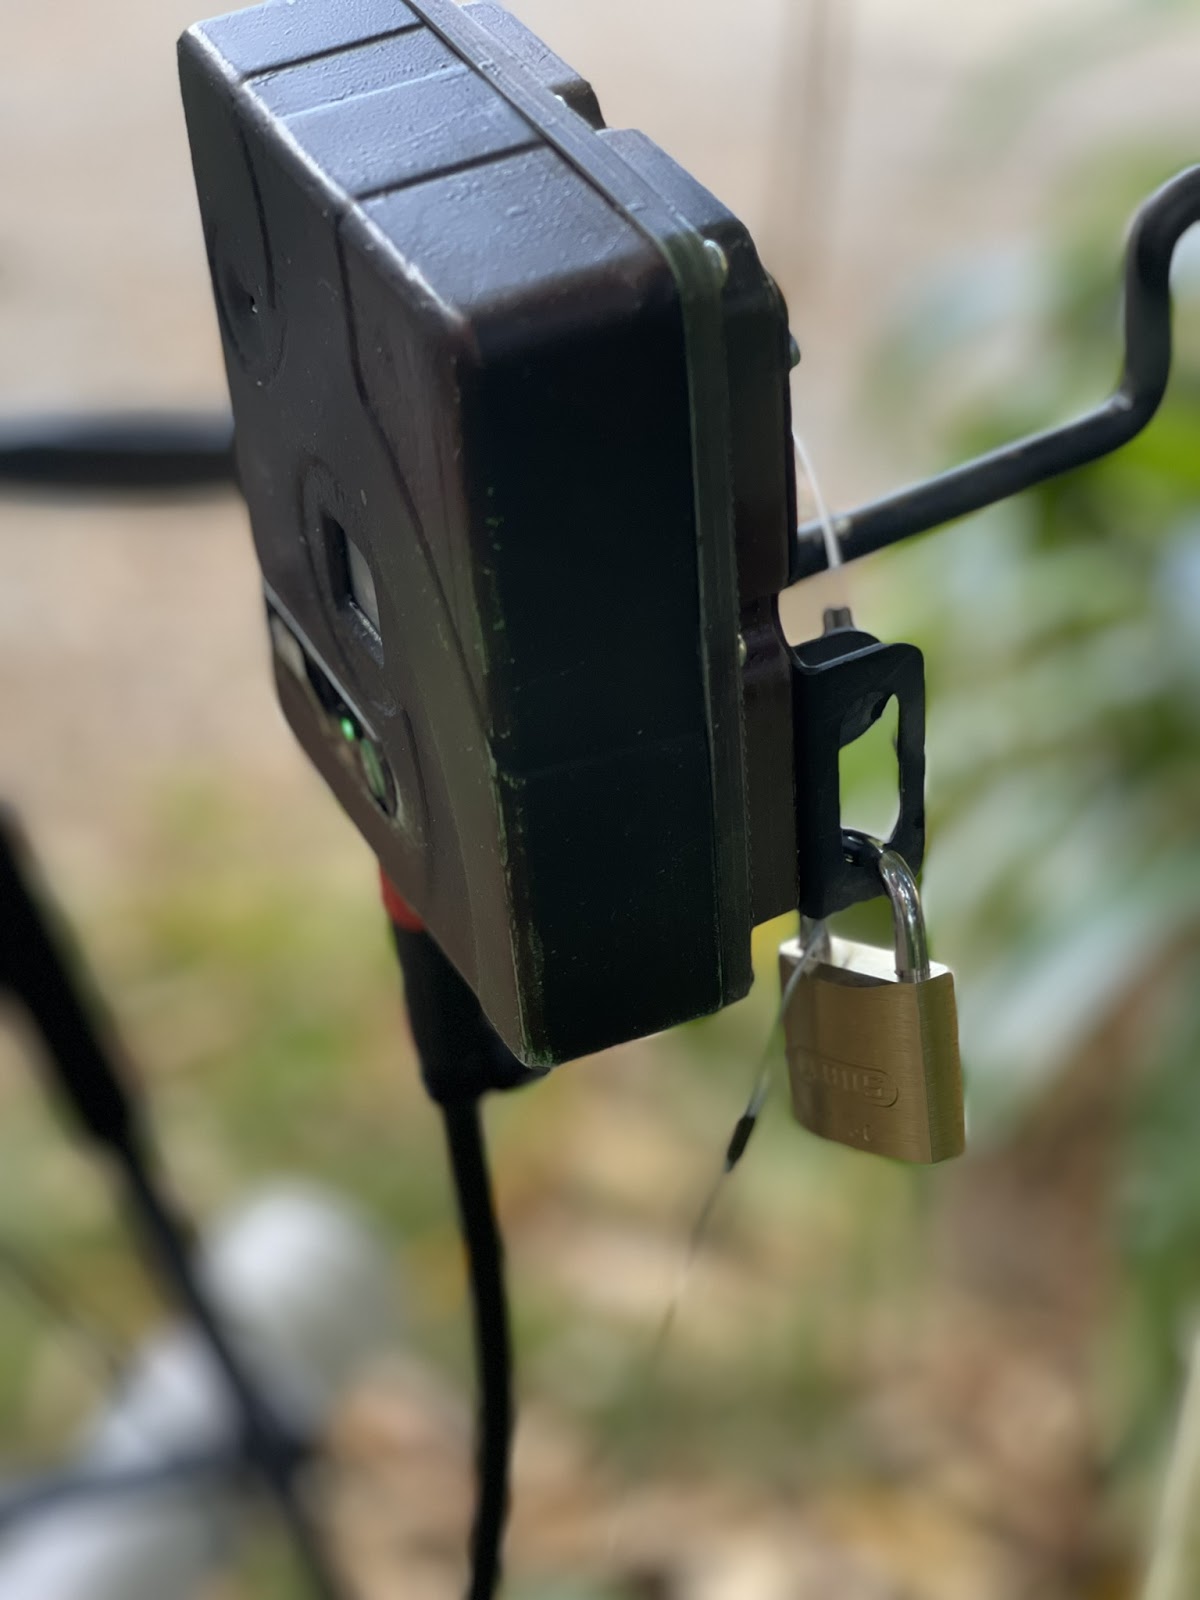
You can secure your camera by using a padlock and chain using the holes on the side of the camera
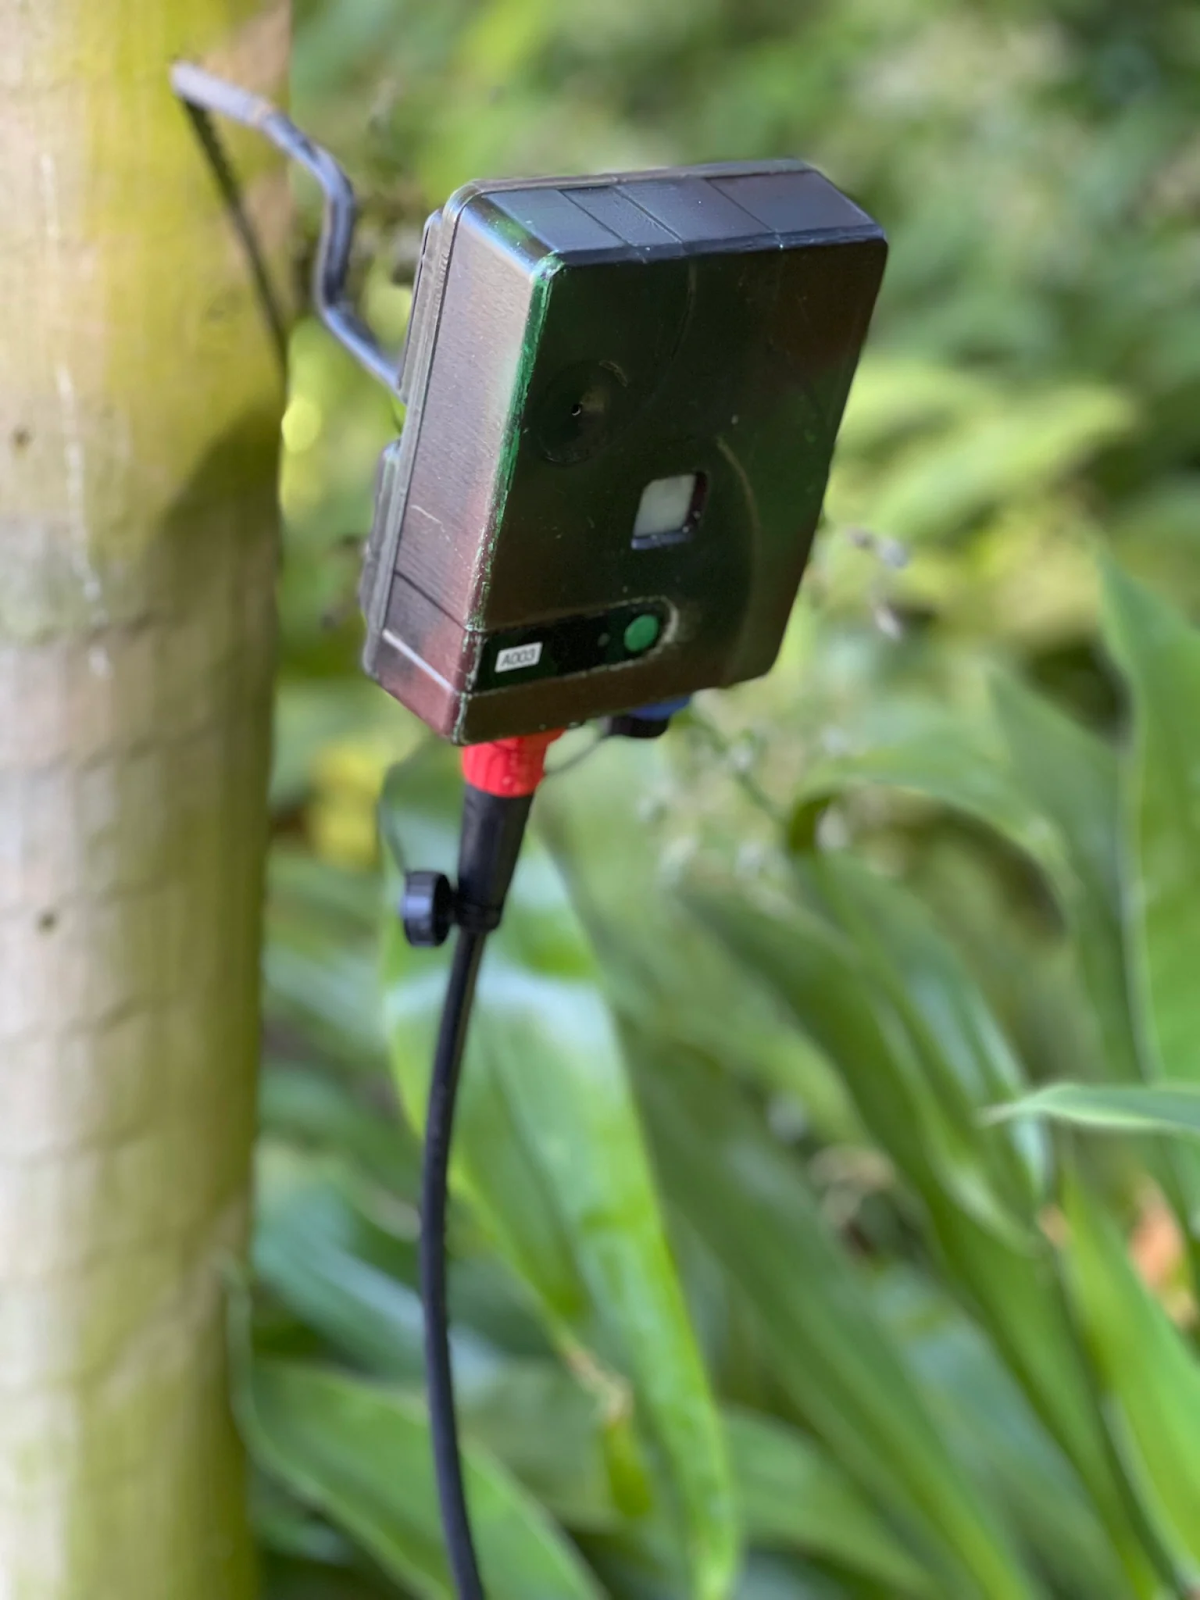
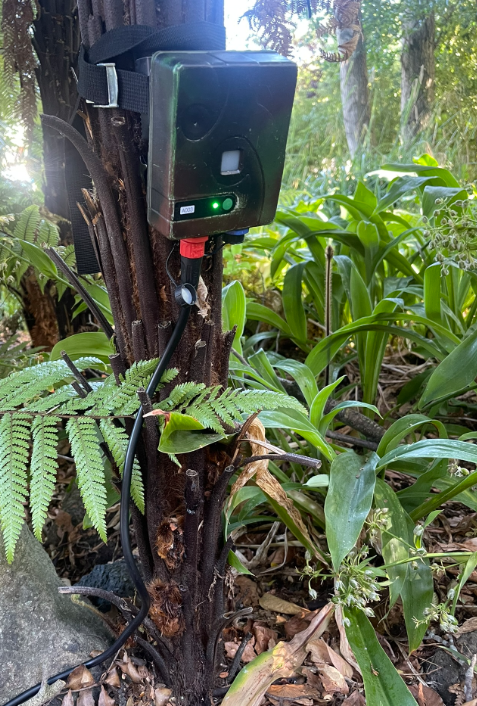
4.2.1 Tree spike
To use the tree spike, remove the hinged mount by unscrewing the pin.The tree spike then clips into the back of the camera.
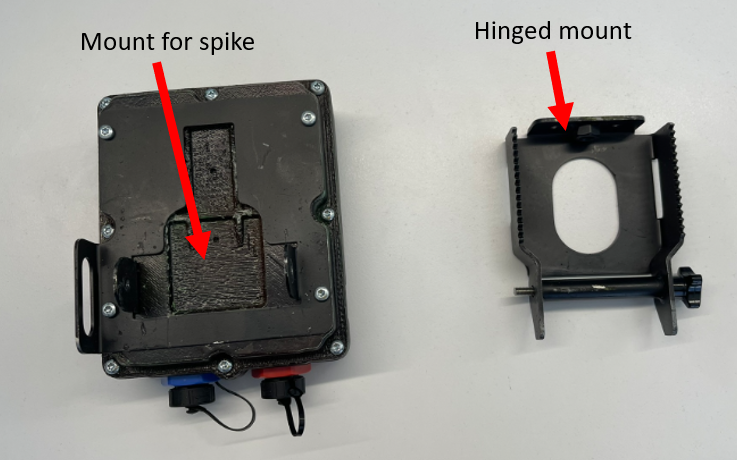

The tree spike simply screws into a tree or post and then you can adjust the angle of the camera by bending it.
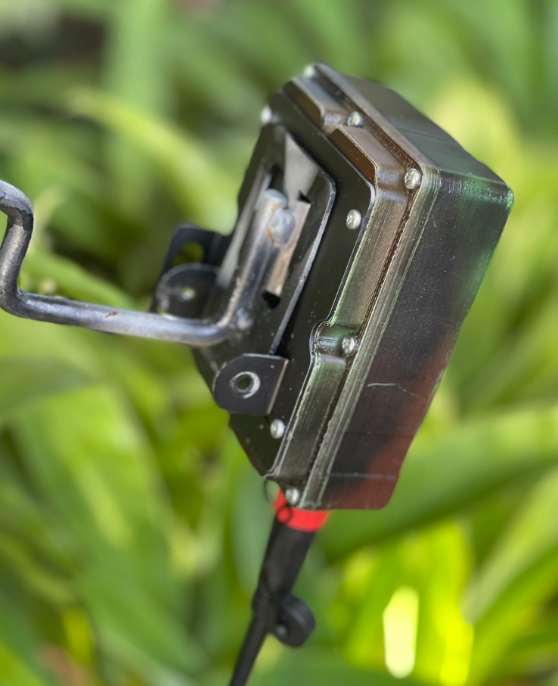
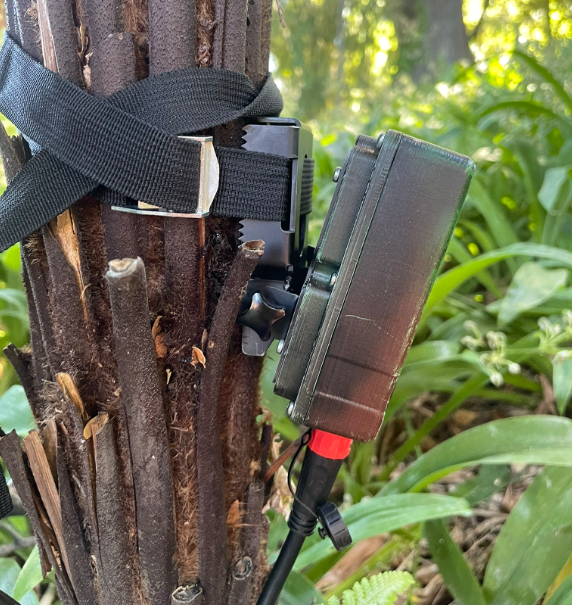
4.2.2 Straps
The camera comes with a hinged mount that can strap to a tree or post. The hinge can then be used to adjust the angle of the camera and secured by tightening the pin.
4.2.3 Tripod
The hinged mount can also be used to attach the camera to a tripod. To do this remove the pin and flip the mount over, as pictured below. A tripod can then be attached to what is now the bottom of the hinged mount.
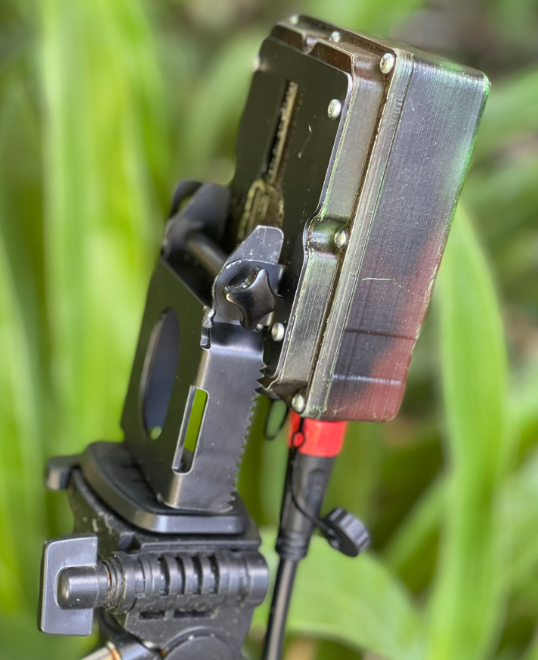
We recommend securing the tripod legs to the ground with pegs to reduce the likelihood of the camera being blown over by wind.
4.3 Connecting power
-
The power socket is the red socket on the bottom of the camera. The best way to attach the power cable from the battery, solar or AC power unit is to gently push the connector against the socket and rotate until it connects with a click.
4.4 Create an account on the Cacophony Portal
If you already have an account you can skip this step and log into the Cacophony Portal using your username and password.
-
Open a browser and go to https://browse.cacophony.org.nz/
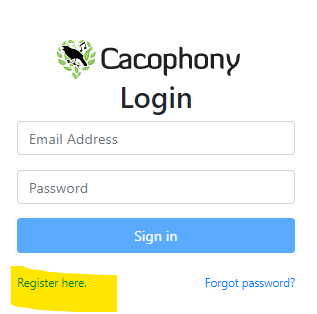
-
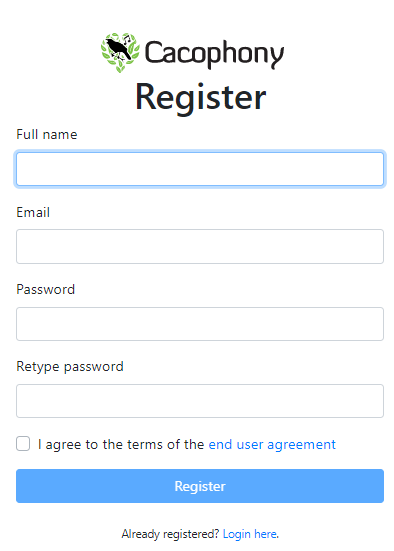
Click on the register here link
-
Create an account filling in your name, email address and password
4.5 Create a group
Groups are used to manage access to video and audio recordings from Thermal Cameras. You must create a group for your Thermal Camera to be assigned to, even if you only have one device.
If you already created a group that you would like to assign your camera to then you can skip this step. Otherwise create a group by either:
-
Click on the “Create a Group” button if you don’t have any groups
Or:
-
Click the ‘Groups’ link on the top right
-
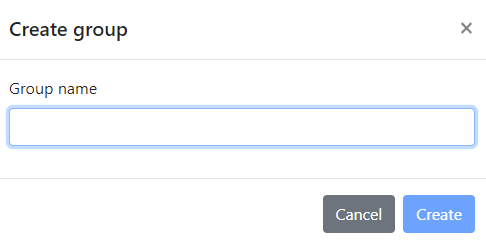
Click ‘Create Group’
Enter your Group name and click ‘Create’
The screen you see now allows you to manage your groups and give others access to the recordings associated with groups. This is described in more detail in 7.7 Giving others access to your recordings..

4.6 Install the Sidekick app
You use the Cacophony Sidekick app to test and configure the camera. This app can also be used to download the recordings if your camera doesn’t have a modem or WiFi connection. The app is available on Android and iOS.
Once Sidekick is installed, open it up. A login screen will appear next. Enter your Cacophony Project username and password here, or if you don't have an account yet use the Register button to create yourself an account.
The first time it is run you will be asked to give Sidekick various permissions. Click "Allow" for each permission so that Sidekick can operate correctly. Sidekick needs access to the device’s location because this is shared with the camera. It needs access to the media so it can store recordings from the camera and upload them to the Cacophony Project's servers.
4.7 Connecting to the camera
Your phone connects to your camera via wifi and uses the Sidekick App.
When the camera starts up it will show a blue flashing light while it is booting. It will then try to connect to a known WiFi network. While it is doing this it will show a green flashing light. If it connects to a WiFi network, the green light will stop flashing and be solid green. If it can’t connect to a WiFi network after 10s then it will set up one called bushnet that you can connect your phone to. It will flash yellow while it is setting this up and be solid yellow once it is set up. After 10 minutes of no activity the camera will disable the hotspot to save power.
The camera has one WiFi network that it already knows about, called bushnet, password feathers. If you set up a network with this name and password then the camera will connect to it.

The two ways you can connect your phone are:
-
Wait until the camera has set up its own WiFi network (when it shows a yellow light) called bushnet and then connect to this. You can do this in the app by pressing
at the top right of the Sidekick app. Alternatively you can connect to it like you would any other WiFi Network (password:feathers)
-
If the camera is connected to a WiFi network (green light) and your phone is connected to the same network then your phone and the camera will connect. The section below describes how to connect your camera to a WiFi network.
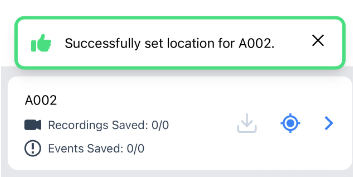
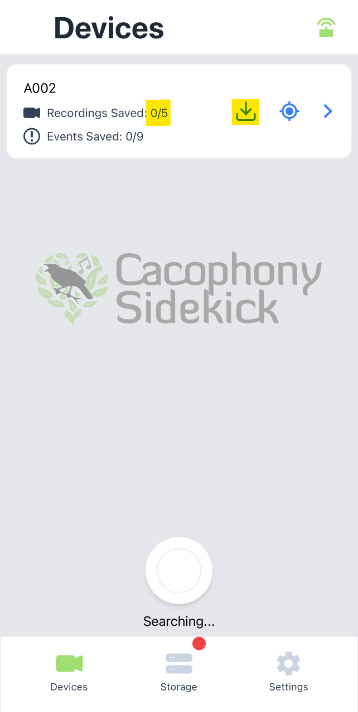
Once you are connected and you have the Sidekick app open your camera’s should appear in the Sidekick App.
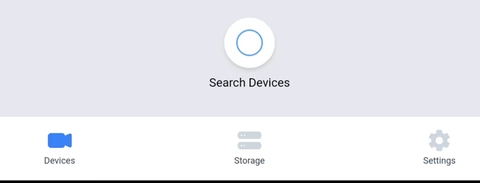
If you can’t see it then click the search devices button at the bottom
There are three buttons beside your camera name:
-
Download recordings and events
-
Update location
-
Open configuration men
To set the camera up for the first time it needs to be connected to the internet. We recommend doing this at work or home, where you have an internet connection or cell coverage. The first step is to connect your camera to a WiFi network.
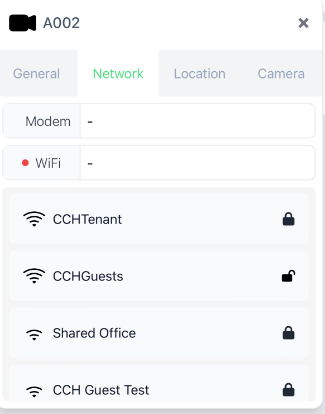
4.8 Connect to a WiFi network and testing your modem
The camera can connect to WiFi networks that require a simple username and password.
Some corporate or free WiFi networks require you to sign in to access the internet. You can’t do that on this camera. In this case we recommend setting up a WiFi hotspot on your phone and connecting the camera to that.
The camera has one network that it will connect to automatically called bushnet, password feathers. If you set up a hotspot on your phone called bushnet with the password feathers then the camera will connect to that automatically.
Alternatively you can connect to your local WiFi network, or phone’s hotspot following these steps:
-
Once you are connected to the camera, in Sidekick click the
-
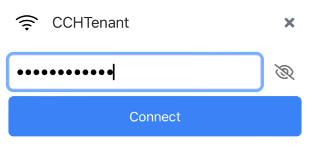
Select the WiFi network you’d like to connect to and type in your password. Click the
icon to see your password, if needed. Then press the connect button. The camera will then attempt to connect to the Wi-Fi and you should make sure your phone is connected to the same network.
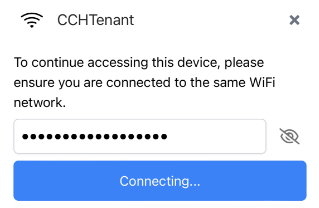
-
To test that this has worked, check your phone is connected to the WiFi network. The camera should show a green light. You should be able to connect to the camera using the Sidekick app.
It is useful to connect your camera to a wifi network so it can update its software (described below). If the camera is going to be within range of a WiFi network, and is configured to use it, then it will upload the recordings it makes to the Cacophony servers that way. If the camera has been operating without a connection and is brought back within range of a WiFi network for which it has been configured, then it will automatically upload any stored recordings.
4.8.1 Checking your modem is working
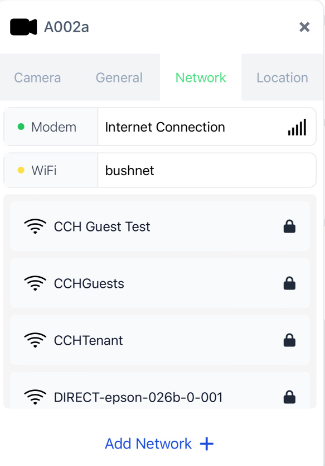
You can check that your modem is working by clicking on the network tab. The modem section will show the status of your modem. If everything is working it will show green and the words Internet Connection. The bars on the right will show the signal strength.
4.9 Assign your camera to a group.
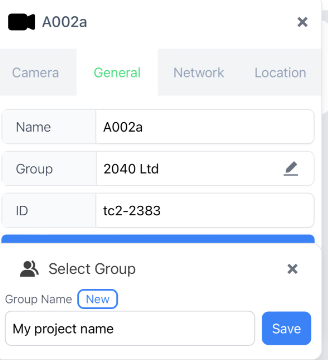
To assign your camera to a group, the camera needs to be connected to the internet. Click on the General tab. Then click on the group box and either select an existing group, or type the name of a new group you’d like to create and click save.
4.10 Confirm the camera is working
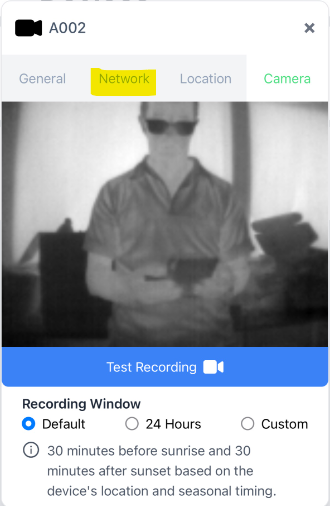
You can view the live camera stream from Sidekick. This is useful to confirm everything is working and to position the camera when you are setting it up to record predators.
-
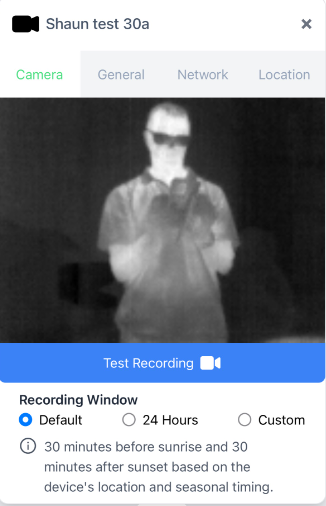
Click on the camera tab and a live view from the thermal camera should appear. This confirms that the camera is working
-
Click the "Camera" button.
You can take a test recording by pressing the button and do a little dance in front of the camera. If the camera is connected it will upload the test recording. If the camera is not connected, you will be able to use the Sidekick functionality to retrieve the recording and upload it from your phone when you are in reception (as described in detail below).
When the recording is uploaded, you will be able to see it on the Cacophony Portal. This is described in Section 7.1: Accessing the recordings
4.11 Set the location.
All recordings the camera makes are tagged with a location. When you connect to the camera with the Sidekick app, the app checks the location stored in the camera and compares it to the current location of the phone. If this is significantly different it will prompt you to update the location:
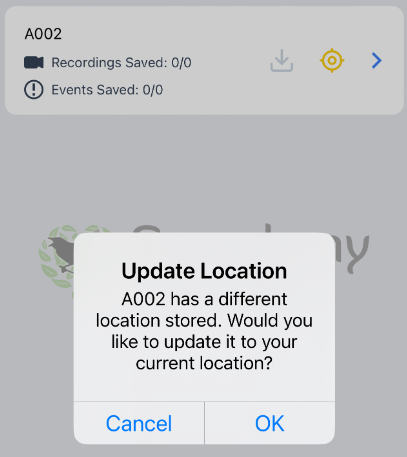
Click OK to update it - if you’re connected to the internet this location will be created on the Cacophony Server.
You will also be prompted to give the location a name and take a photo. You will be able to see these locations on a map, but by giving it a name it will make it easy to search for it as well. The photo can help with understanding the thermal videos. We recommend taking a photo from the point of view of the camera. When you are viewing the thermal videos you can click on the symbol to see this photo.
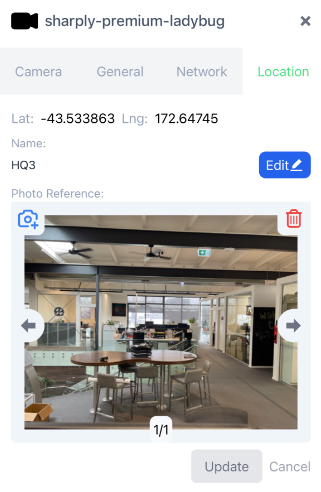
If you don’t give a location a name then one will be automatically generated that looks something like
New station for Stoat hunter_2021-10-15T00:39:04.422Z
Group admins can rename this on the Cacophony portal by navigating to the station page (clicking on the station name) and clicking the edit icon.

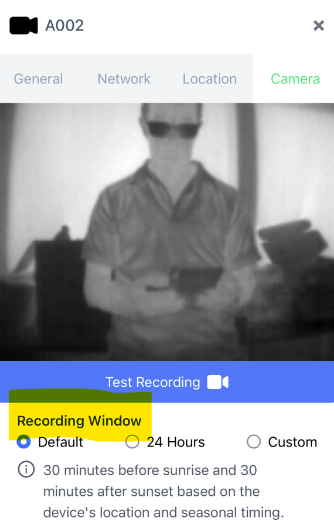
4.12 Set a recording window
On the camera tab you can set the recording window for recording videos.
-
The default starts recording 30 minutes before sunset and stops 30 minutes after sunrise. It’s important you have set the location correctly because the exact time of sunrise and sunset vary with the location and the time of the year.
-
24 hours records all the time
-
Or you can set a custom recording window.

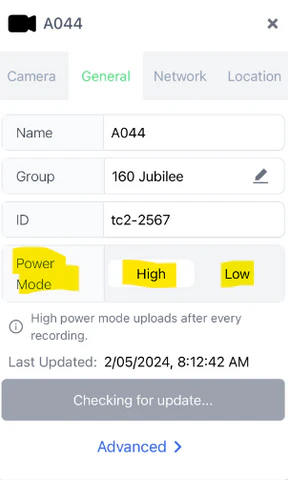
4.13 Set a power mode
The camera can operate in high or low power mode. The main difference is in high power mode recordings are uploaded immediately. In low power mode they are uploaded once per day. Low power mode uses about ⅕ of the power compared to high power mode.
You set the power mode in the general tab.
Congratulations, your camera is set up and ready to go.
5 Recording predators
When you are ready to begin recording predators take the following steps:
-
Set the camera about 1m from the ground. Some people have been able to successfully monitor predators with the camera much higher - up to 6m from the ground.
-
Connect the power supply (either mains, battery, or battery with solar), ensuring that the plug clicks into the socket.. This is important to ensure the connection is waterproof and remains secured.
-
Use the Sidekick app to connect to the camera (the easiest way to do this is to connect to the camera’s hotspot once the light is yellow)
-
Use Sidekick to set the location of the camera (see 4.12 - Set the location), give the location a name and take a photo
-
Use the Camera option on the menu to view the live camera feed and adjust the alignment of the camera until you are satisfied (see Section 4.10 - Confirm that the camera is working).
-
As you are aligning the camera, position it so it is pointing down slightly to ensure that it will not be pointing at the sky. If it’s pointing at the sky then it will record a lot more uninteresting footage because the sky provides a cold, contrasting background for foliage that is moving. The image below is an example of poor positioning, where there is a concrete wall on the right and foliage on the left and above that warms during the day and small movements trigger false positives. The foliage should cool down fairly quickly at night but in the warmer months something with the thermal mass of a concrete wall will dominate the image all night.

Your camera will then begin recording after dusk (unless you have changed the recording time) when it detects predators.
Note that the light that you see on the front will turn off after 5 minutes, but the camera will remain on.
6 Collecting Recordings
Recordings created by the Thermal Camera need to be uploaded to the Cacophony servers for processing and storage. This can happen in the following ways:
-
Via WiFi if the camera is within range of a configured WiFi network.
-
Via mobile network if the camera has a modem installed and is within range.
-
By moving the camera within range of a mobile or WiFi network (take it home and plug it in - remember you need to enter the details of the WiFi network - See 4.11 Connect to a WIFI network)
-
By connecting the camera to the Sidekick app and uploading the recordings to your phone. This process is described below.
6.1 Uploading recordings using the Sidekick app
These instructions assume that Sidekick has already been installed and configured on your phone (see 4.6 Install the Sidekick app). There are two steps:
-
Collect the recordings off the camera onto the phone.
-
Upload the recordings from the phone to the Cacophony Project's servers.
To collect recordings from a thermal camera:
-
You will need enough storage on your phone to store the videos. A rough guide is that there will be about 3GB of recordings for every month that the camera has been out there. It will be more if the
-
Walk up to the camera - you should be within about 5m for the hotspot to connect.
-
If you are planning on changing battery packs, this is a good time to do so.
-
Give the button a short press to see the status of the camera.
-
If the light is blue then press it again until the light turns red. The camera will turn off. Then press it again to turn the camera on. The light will be yellow when the camera has set up the hotspot.
-
If the light is red then turn the camera on by pressing the button for 3s, until the light turns white. The light will turn yellow when the camera has set up its hotspot.
-
Connect to the camera’s bushnet Wi-Fi (see 4.7 Connecting to the camera).
-
Run the Cacophony Sidekick app. It will start searching for nearby cameras.
-
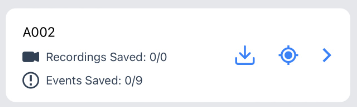
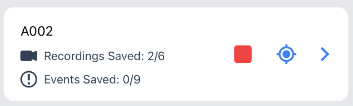
The camera's name should appear. The number of recordings available on the device will be indicated.
-
Tap the ‘Get Recordings’ button,
to transfer recordings from the camera to the phone/tablet. As recordings are downloaded, the number of recordings on the device should count down. When the transfer is complete, "No recordings to download" will be indicated.
-
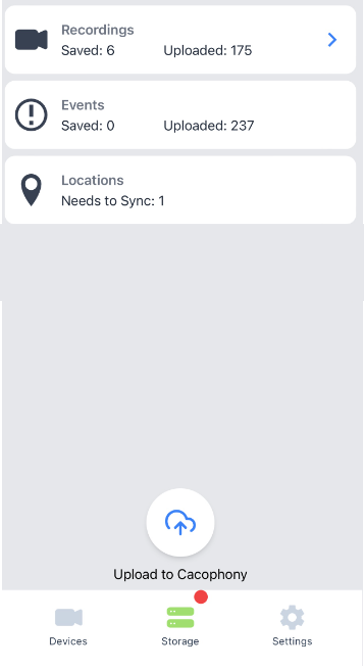
If you click on the Storage tab at the bottom, you can see the recordings that have been saved.
-
You may now leave the camera.
To upload the recordings from the phone to the Cacophony Project's servers, the phone must have access to the internet (via WiFi or mobile connection). If the phone is connected to a WiFi network then it will upload these files automatically. To do this manually:
-
Ensure the phone is connected to a WiFi network or has mobile network coverage.
-
Open the Sidekick app.
-
Click on the storage button at the bottom, then click the “Upload to Cacophony” button to upload the recordings to the cloud.
-
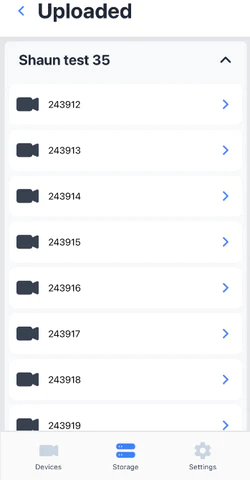
You can also quickly view any recordings by clicking on the arrow beside the recordings. This will show you a list of the recordings. Clicking on any of them will let you view the recordings on the Cacophony portal. Note if these have just been uploaded then they may still be being processed.
7 Accessing recordings and analysing the data
Log onto the Cacophony Project portal to access the recordings and statistics with a web browser at https://browse.cacophony.org.nz/
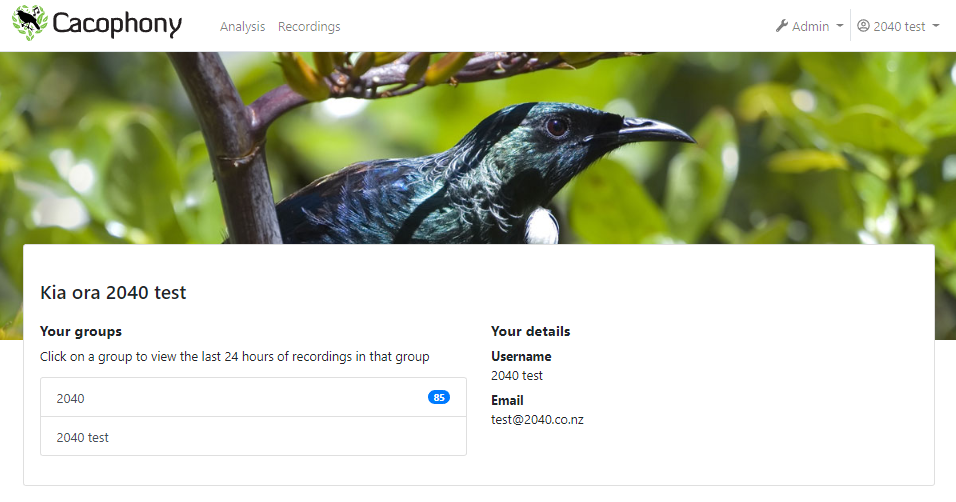
7.1 Viewing recordings
When you first log on to the portal you can see the groups that you have already created. Beside each group is the number of recordings that have been made. To view the recordings from that group simply click in the group name and this will take you to the recordings page.
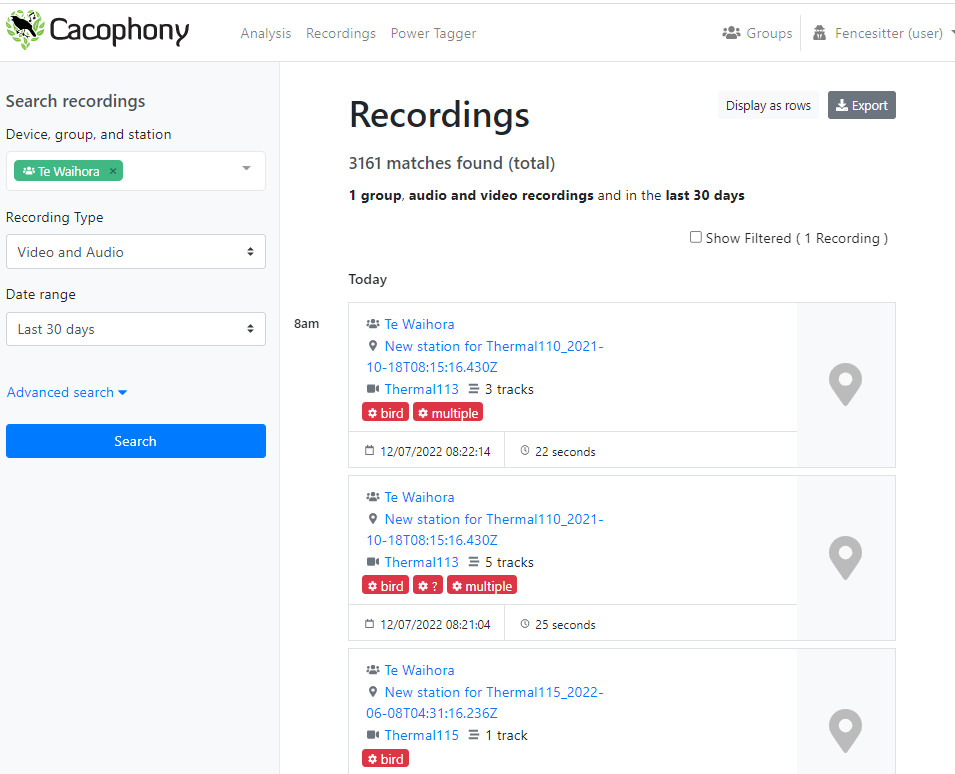
The recordings page shows you the most recent recordings first and lets you search through your recordings by:
-
Device, group, or station name - either select from the drop down or type to find your device, group or station.
-
Recording type: Video, Audio, or both. Audio recordings are made by the Bird Monitor.
-
Date range - select a predefined range from the drop down or select custom and enter a From Date and/or a To Date.
More filtering options are available if you select the Advanced Search:
-
Duration - select a predefined duration or custom and enter a lower limit and an upper limit.
-
You can further filter by:
-
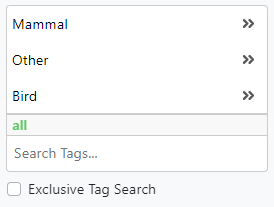
Tag type:
-
Tag- tagged either automatically or by human. Either type to find the tag you want to search for, or pick from the pop up box. Click the
to see more options. If you search for a tag that has tags underneath it, then recordings with that tag or any of the tags underneath it will be returned. If you check the Exclusive tag search box then it will search exclusively for the selected tag(s) and not the child tags. For example if you search for mustelid then you will get recordings tagged with mustelids, stoats, ferrets, and weasels. However if you check the Exclusive Tag Search box then you would only see recordings tagged with mustelids.
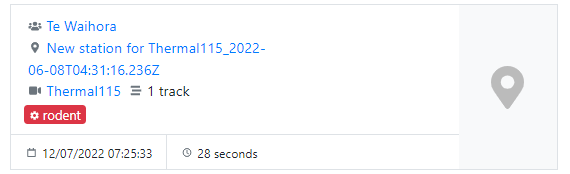
Each search result in the table underneath represents a recording. The following information is shown for each recording:
-
Group: This is the group that your device belongs to (Te Waihora above).
-
Station: This is the location where the recording occurred. (New station for Thermal115_2022-06-08T04:31:16.236Z). If you haven’t named it, a name is automatically generated when a new location is created (more information below).
-
Device name: This will be the name that you have given your device. (Thermal115)
-
The number of tracks in the video.
-
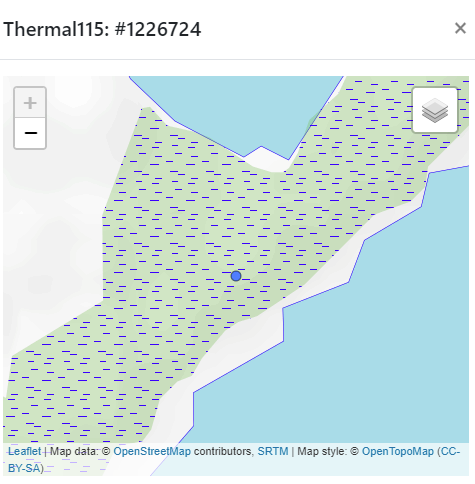
Location: Click to open up an interactive map showing the location
-
Tags: Any tags that have been added are shown in different colours:
-
Red tags have been added automatically by the machine vision algorithm and have not been verified by a person.
-
Manually added by a person
-
Blue tags have been manually added by a person and agree with the automatic tag.
-
Date and time: When the recording was made.
-
Duration: How long the recording is for.
To view a recording click anywhere in the box that is not a link.. This will take you to a screen that allows you to:
-
Play the recording.
-
See any tags that have been assigned to the video and add additional tags.
-
Add comments - simply type in a comment and press save.
-
Download the recording.
-
Delete the recording.
-
Navigate to the next and previous recordings.
-
View technical details - these will probably be of little interest to most users.
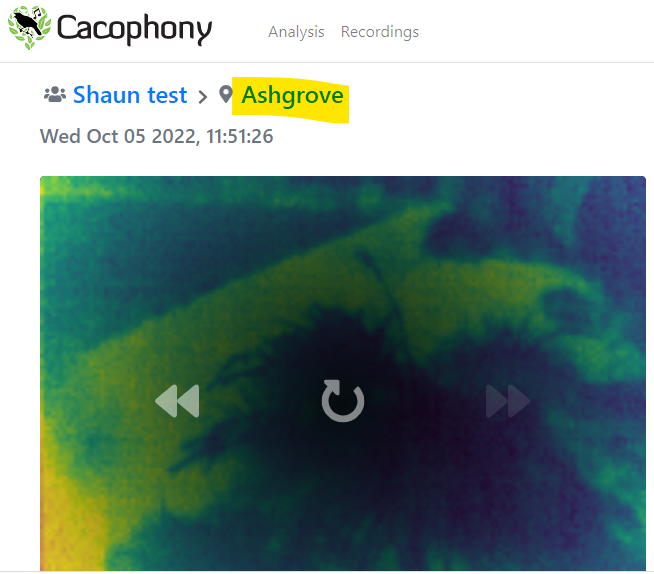
The top of the page shows the group and station name and the time of the recording. The video will start playing automatically. You can change the speed by clicking the multiplier in the bottom right hand corner.
7.2 Tracks, tags and artificial intelligence
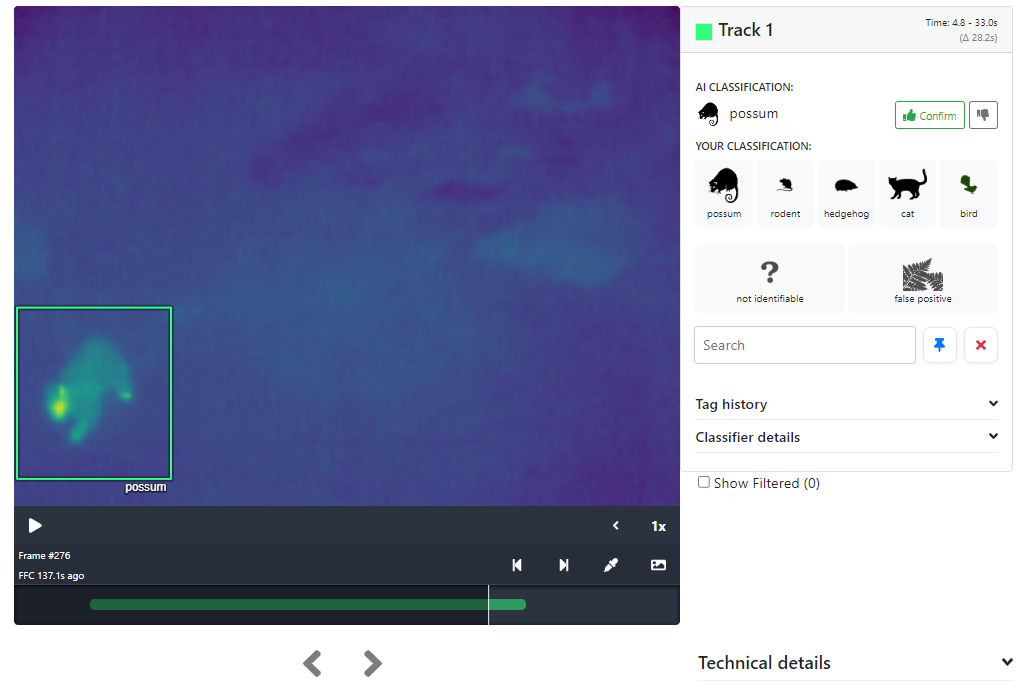
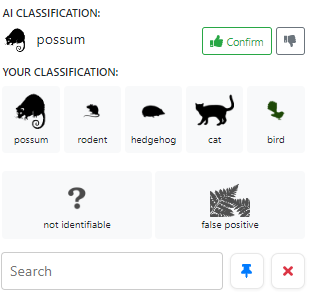
Objects (typically animals) in the video are tracked as they move around within the field of view. There may be multiple animals in any one recording and multiple tracks. The machine vision algorithms run on each of these tracks and if an animal is recognised with a high degree of confidence then the track is tagged with that animal. In the image below, there is only one track and it has been marked as a possum. The box around the image is labelled Track 1 and the green box in the right contains the information about Track 1, including
-
The start time, end time and duration of the track (in this case the track is almost the same length as the video, because there is only one animal).
-
Buttons for the different animals that can be tagged. If the machine vision has tagged the track then the AI classification will be shown above the buttons (in this case a possum).
7.2.1 Artificial Intelligence
The machine vision algorithm uses a type of artificial intelligence technique known as deep learning (also called a neural network). The algorithm learns from examples of videos that have been manually tagged. It can and does make mistakes but one of the nice features of this algorithm is that it can improve if it is given a broader range of examples. You can help improve the algorithm by tagging videos that you watch. It’s useful to know both when the machine vision gets the identification wrong and when it gets it right.
At the moment the machine vision algorithm is only trained to classify a limited number of animals because these are the animals that are most important to track and for which we had sufficient examples to train the classifier. The animals currently classified include rodents, birds, stoats, possums, hedgehogs, cats, wallabies, penguins, humans, vehicles and false-positives. A false-positive is when a recording was made, but there was nothing of interest in the recording, for example triggered by moving foliage. If there is an animal present that is not in this group then the classifier will often make a mistake. This will improve as we collect more data and expand the list of animals that are classified
7.2.2 Tagging a track
To tag a track, simply click on the button corresponding to the animal you recognise The current options are possum, rat, hedgehog, cat, bird, not identifiable, and false positive. If the AI has got it right then just click confirm.
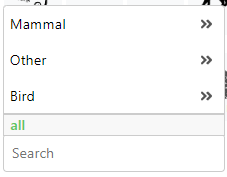
If you want to tag the track as something else then click on the search box and either navigate to the tag you want by clicking on the , or just search for it.
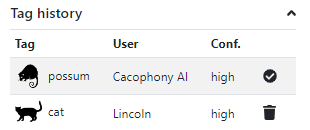
You can see who has created tags by clicking on the tag history. You can delete your tag by clicking on the icon. If you are an administrator you can delete other people’s tags. Note the name that is shown in the tagging history is the display name. This can be changed on the homepage.
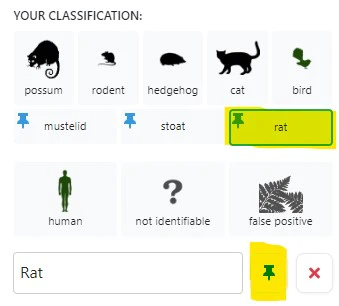
7.2.2.1 Creating new tag buttons
Once you've made a selection you can create a button for that tag by clicking the pin icon to the right of the search box. If you already have a button for that tag, then clicking this will remove the button. Pinned buttons are only stored on your device, so if you access this through more than one device you will have to pin buttons on each device.
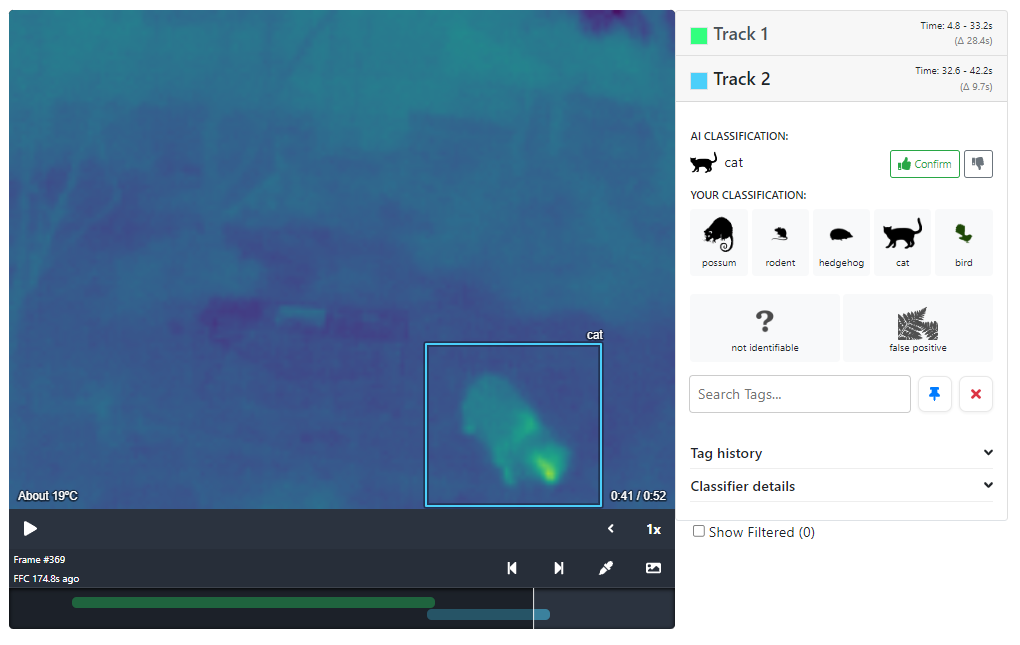
7.2.3 Multiple tracks
Occasionally multiple animals will be captured on one video. When this happens video processing attempts to track each animal separately. A classification is made for each track and you can review the classification and add your own tags to each track. Each track is listed on the right hand side of the video. The tagging box for the first track is opened by default. The others are opened as the video gets to them
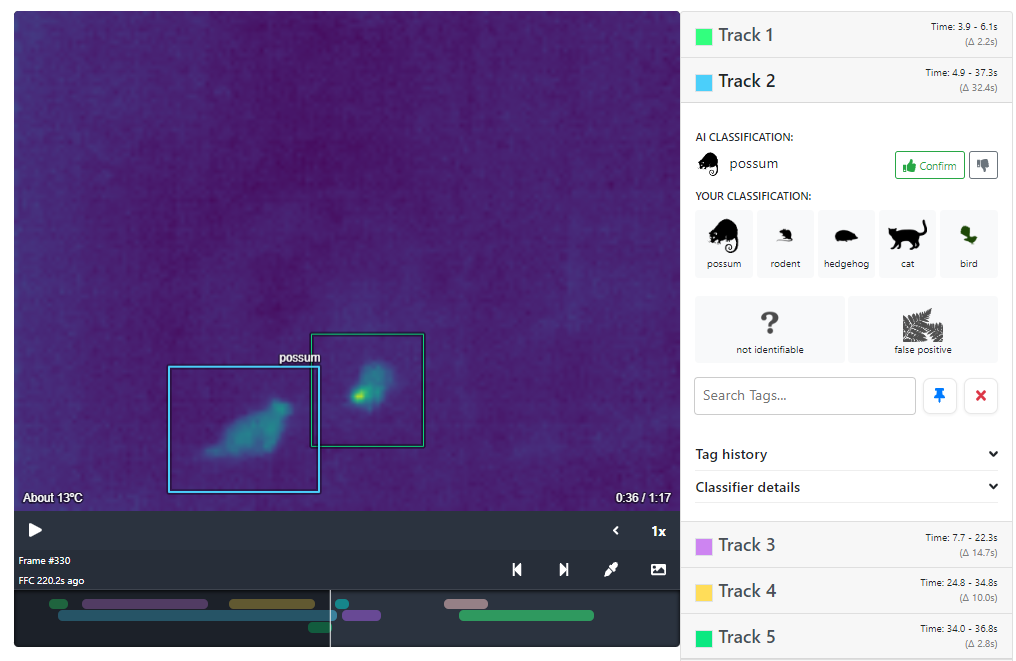
If you click on one of the other tracks then the video plays from the start of the track. The colour of the box in the video corresponds to the colour of the track on the right hand side. The duration of the track is shown by a bar of corresponding colour at the bottom of the video.
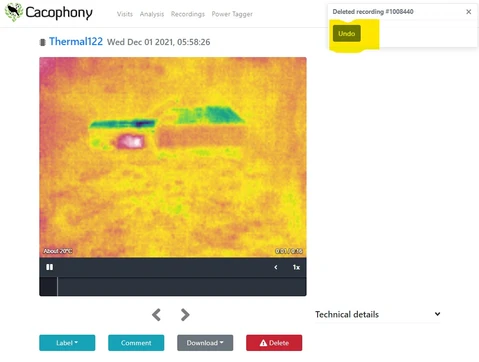
7.3 Deleting a video
To delete a video simply click on the Delete button. The video will be deleted and the next video will be shown.

You may want to delete a video if it’s not interesting, shows something you didn’t want recorded, or to save space. You can undo the delete by clicking on the undo button in the box on the top right.
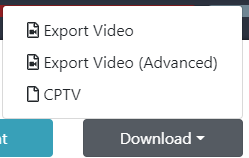
7.4 Downloading a video
If you would like to download a video so you can share or store it there are two options. You can either download the raw video (Export Video), or the CPTV format (which may be useful for developers and data scientists).
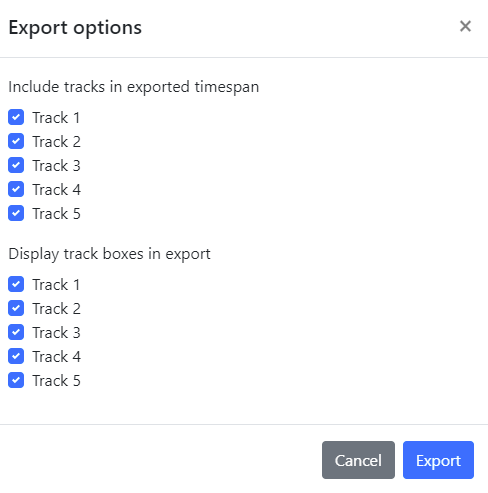
The advanced export gives you some options about which tracks to include and to display.
7.5 Analysing your data
To do a detailed analysis you will need to extract the data and import it into a spreadsheet or other analysis program. There are a couple of ways you can do this: Exporting to CSV or accessing it via an API.
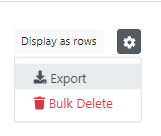
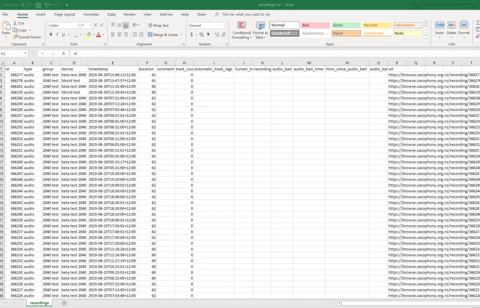
To export the data to CSV, first, go to the recordings page and put in the criteria that you are looking for and press the search button. For example you may want all the recordings that contain a possum from a particular camera over a particular date range. Then click the cog at the top right of the page and select export from the menu. This will export the data on the current page directly into a CSV file that can be opened up in a spreadsheet.
There is a limit of 10,000 lines that can be exported at once. If you’d like to export more than that then you will have to do several exports, changing the date range for each to keep the total results to less than 10,000.
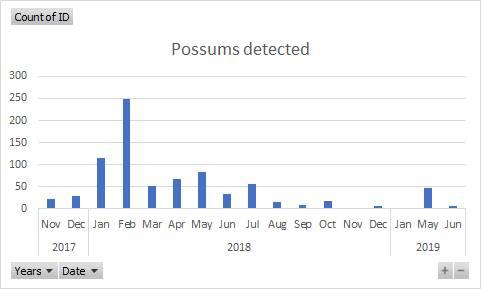
You can then process this in whichever way you like. For example a pivot table allows us to see how the number of possums detected has changed over time.
If you have programming skills you can access your data via an API described below.
7.5.1 Visit Analysis
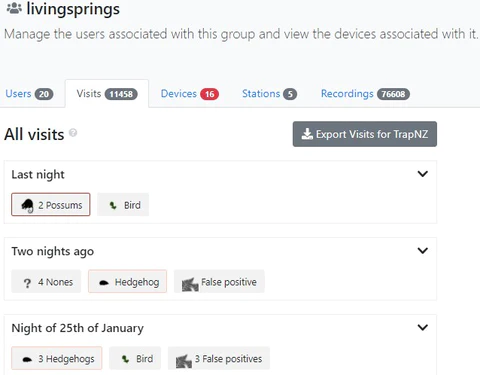
A powerful way of analysing your recordings is to look at the visit analysis. This shows the number of visits of animals, rather than the number of recordings.
We have developed an algorithm to count visits rather than sightings. So, if an animal appears in two or more consecutive videos it will count as one visit for that animal. We found we were doing this manually when we were analysing the data from a camera. This makes the process much easier. The visits reports can be accessed from the Group link at the top of the Cacophony Portal, selecting your group and then clicking the visits tab.
The visit analysis is particularly useful when analysing a large set of data. For example when we were testing the effectiveness of a trap over 3 months there were about 4000 videos in total. Of these about 380 were tagged as possum but the visit analysis showed that there were actually only 60 different visits by possums (each visit had on average about 5 different videos). Obviously the artificial intelligence to identify the possums makes the analysis much faster but this visit analysis makes it faster again. There is a summary table that shows how many visits from different predators for any particular time period.
7.6 Using the Cacophony API
You can access all of your data programmatically using an Application Programming Interface (API). The documentation for accessing this API can be found here: https://api.cacophony.org.nz/
7.7 Giving others access to your recordings
The person to whom you want to give access to the recordings from your device must first create an account on the Cacophony Portal and let you know the user name they used.
You can give them access by clicking on the Groups link on the top right
Select the group of devices that you would like to give them access to. You will then be able to see the group name and the devices which belong to that group. Select the users tab to see who has access to this group.

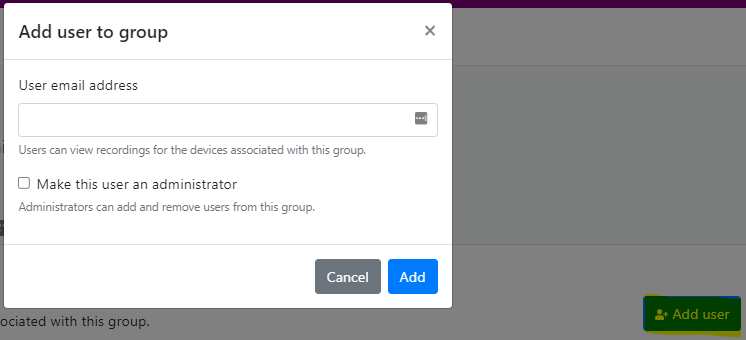
You can give a user access by clicking ‘Add User’, entering their email and clicking the ‘Add’ button. You can make them an administrator of the group by first clicking the Admin checkbox. An Administrator has the ability to add or remove users from a group and to remove tags
7.8 Email alerts for animals
If your camera is in high power mode, you can receive a near real-time email notification when the camera has detected an animal of interest. This email shows the type of animal that was detected, the station where it was detected, the time and a thumbnail.
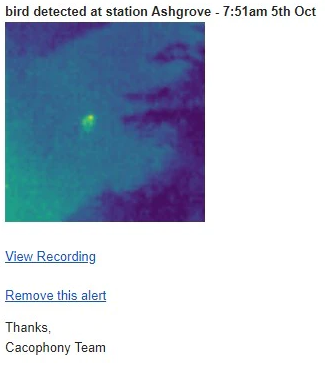
The email is sent out after the video has been uploaded to the Cacophony servers, and processed. In an example the email was sent 6 minutes after the animal was detected. The email won’t be sent if the videos are uploaded via sidekick, or are over 24 hours old. In low power mode you will receive these notifications when the videos are uploaded (once per day).
If a recording would have created multiple emails, then you will only receive one for the first tag that matches. There is also a restriction so you won't receive more than one email alert for the same tag within a 30 minute period. This is to stop your email getting overloaded, for example if there is an animal in a live capture cage.
This may be useful if you are hunting an animal, or if the camera detects a human and you are concerned about the security of your camera.
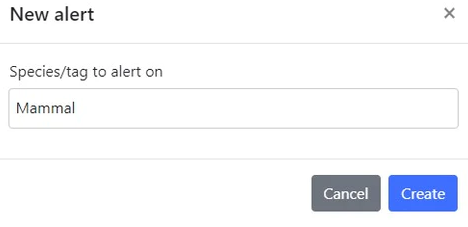
To set these up navigate to the station/location page and click on the Alerts tab.
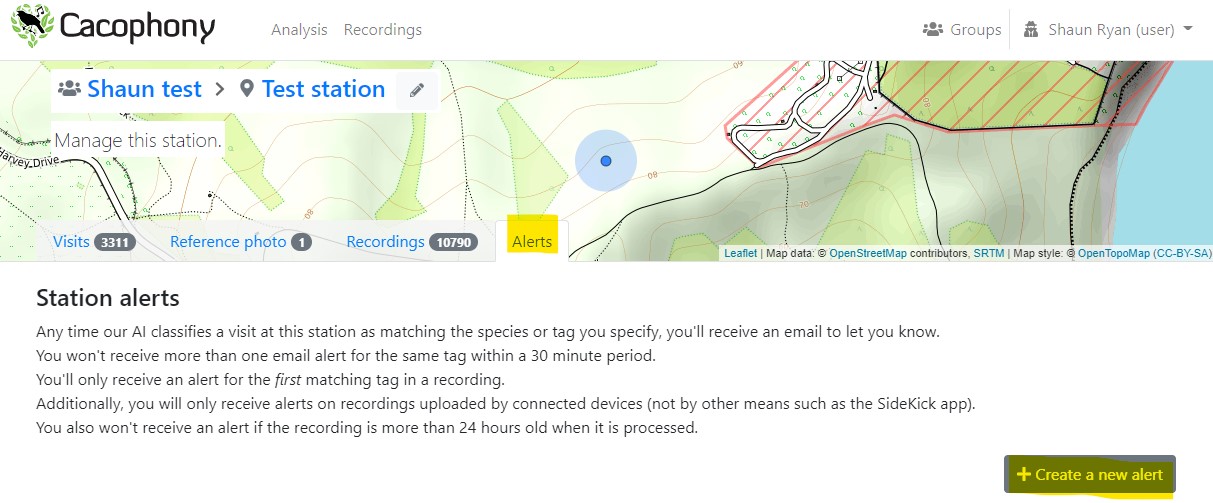
In the pop up box simply select the species/tag that you would like to receive alerts on.
You can remove an alert by clicking on the trash icon next to the alert on the alerts tab, or by clicking on the "remove this alert" link at the bottom of the alert email.
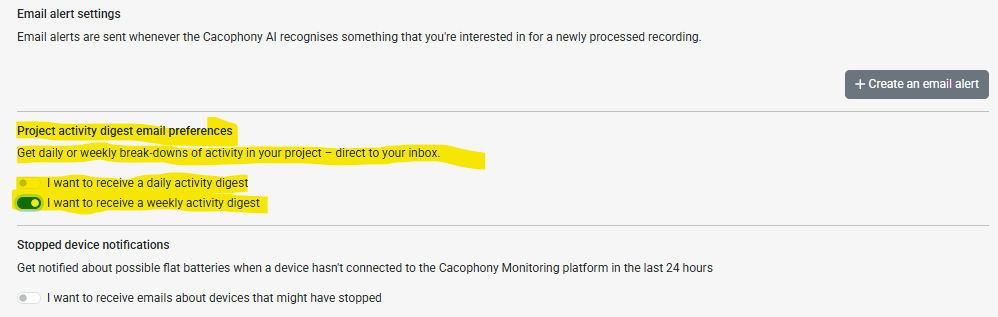
7.9 Email summaries
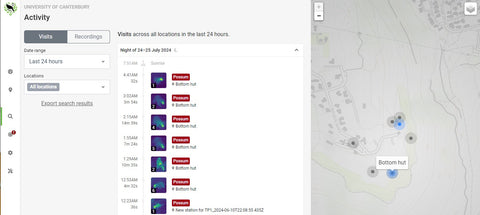
There is an option to receive a daily or weekly activity summary. This shows you how many visits were recorded for each animal detected in your project by DOC AI Cam(s). This is an example.

You can view more details about the activity and review the videos by clicking on the View activity button.
If there has been no activity then you'll get an email on the first day/week noting that there was no activity. After that you won't get another email until there is activity.
This activity summary functionality is only available on our new, beta interface: https://browse-next.cacophony.org.nz/.
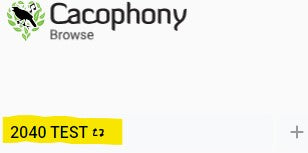
Most people will only have one project, however if you have access to more than one, you can select the project that you want to set up the activity summary for by clicking on the project name on the top left.
To set up the activity summary click on the My preferences link on the left
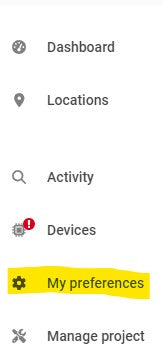
You can then check whether you would like to receive a daily or weekly activity digest. Clicking on the switch will save your preferences.
8 Getting help
If you need help with any problem please contact support@2040.co.nz.
9 Software updates
From time to time new versions of the software used on the camera are released. If the camera is connected to the internet it will check once per day for new software releases which are then installed automatically. If your camera is not connected to the internet and you would like an updated version of the software then you will need to bring it somewhere where you can connect it to the internet (see 4.11 Connect to your local WiFi).
The Sidekick App will also be updated automatically from time to time via Google or Apple.
The Cacophony Portal software is also updated regularly.
To see a list of all the software updates please check here: https://www.2040.co.nz/blogs/news/tagged/software-updates.
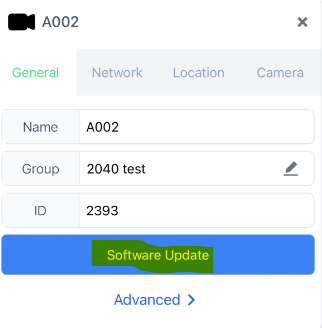
To trigger a manual update go select General Tab and click on the Software Update button.
10 User agreement for data storage and privacy
All the software and hardware developed by The Cacophony Project is open source and is free to use. There is a cost for the storage of the data. These costs and the end user agreement associated with this service is outlined here. This document outlines who has ownership of and access to the data.
11 Transporting
When transporting please package the camera batteries, power supplies, chargers and tripods carefully to ensure there is no damage. Many couriers will not transport lithium batteries. Freightways Stuck service will transport them via ground and sea: http://www.stuck.co.nz/. Often the courier will need a material safety data sheet. This can be found here: https://cdn.shopify.com/s/files/1/0016/0622/1873/files/DNK_Power_MSDS_lifepo4.pdf?142
12 Troubleshooting
12.1 Sidekick won’t connect to my camera
If your camera name doesn't show then please try the following steps:
-
Check the camera is on. If the light on the front of the camera is off, press the button for 1s to see the status:
-
If it is red you need to turn the camera on by pressing the button for ~5s until the white light turns off. The light will then flash blue and then either go green or yellow.
-
If it is green the camera is connected to a Wi-Fi network. You need to make sure your phone is connected to the same Wi-Fi network.
-
If it is yellow the camera is hosting a Wi-Fi network called bushnet. You need to connect to this network (password: feathers)
-
If it is blue then the camera is on but not connected. You can get it to connect by pressing the button again for 1s and the light should flash green while the camera looks for a Wi-Fi network. It will either turn solid green, or yellow and you should be able to connect.
-
Try restarting the Sidekick app.
-
Try restarting your phone.
-
Try unplugging the camera for 10s and plugging it back in again.
-
Make sure there is not another phone with the same hotspot in the area
12.2 What if I see blank images
If you see blank images on the Cacophony Portal then internally your thermal camera chip has probably become dislodged. This can happen if the camera receives a serious knock. In this case the camera will need to be serviced. You should contact support@2040.co.nz for that.

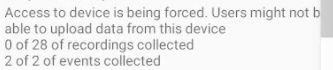
12.3 Access to device is being forced
If you see an error message in Sidekick that Access to the device is being forced then, either:
-
You do not have access to that camera - make sure you log into Sidekick with the correct account. You can do this once you’re back in reception if you don’t have reception and you will still be able to upload the videos
-
Sidekick wasn’t able to confirm your permissions because of a connection issue. This occasionally happens in areas with marginal coverage. In this case logging out and back in should clear the problem and you should be able to upload the recordings.
12.4 Device not registered to same API as user

If you see the above message in Sidekick then please contact us
12.5 User does not have permissions to access this device or its group ([Group name])
This means that either:
-
You do not have access to the group to which the camera belongs. Contact the administrator of the group and let them know your username so they can give you access
-
Or, Sidekick doesn’t know that you have access. Each time you open up Sidekick it checks which groups you have access to. It may be that your access has changed since you last opened Sidekick (when it had access to the internet). Try the following:
-
Close Sidekick down and open it again - when you have an internet connection
-
Log off and back onto Sidekick.
In any case, you can force Sidekick to download the recordings from the camera by going into settings and checking the option to “Force collection of recordings and events from all devices”. This will then allow you to download the images from the camera and sort out your permissions when you are back in internet coverage.
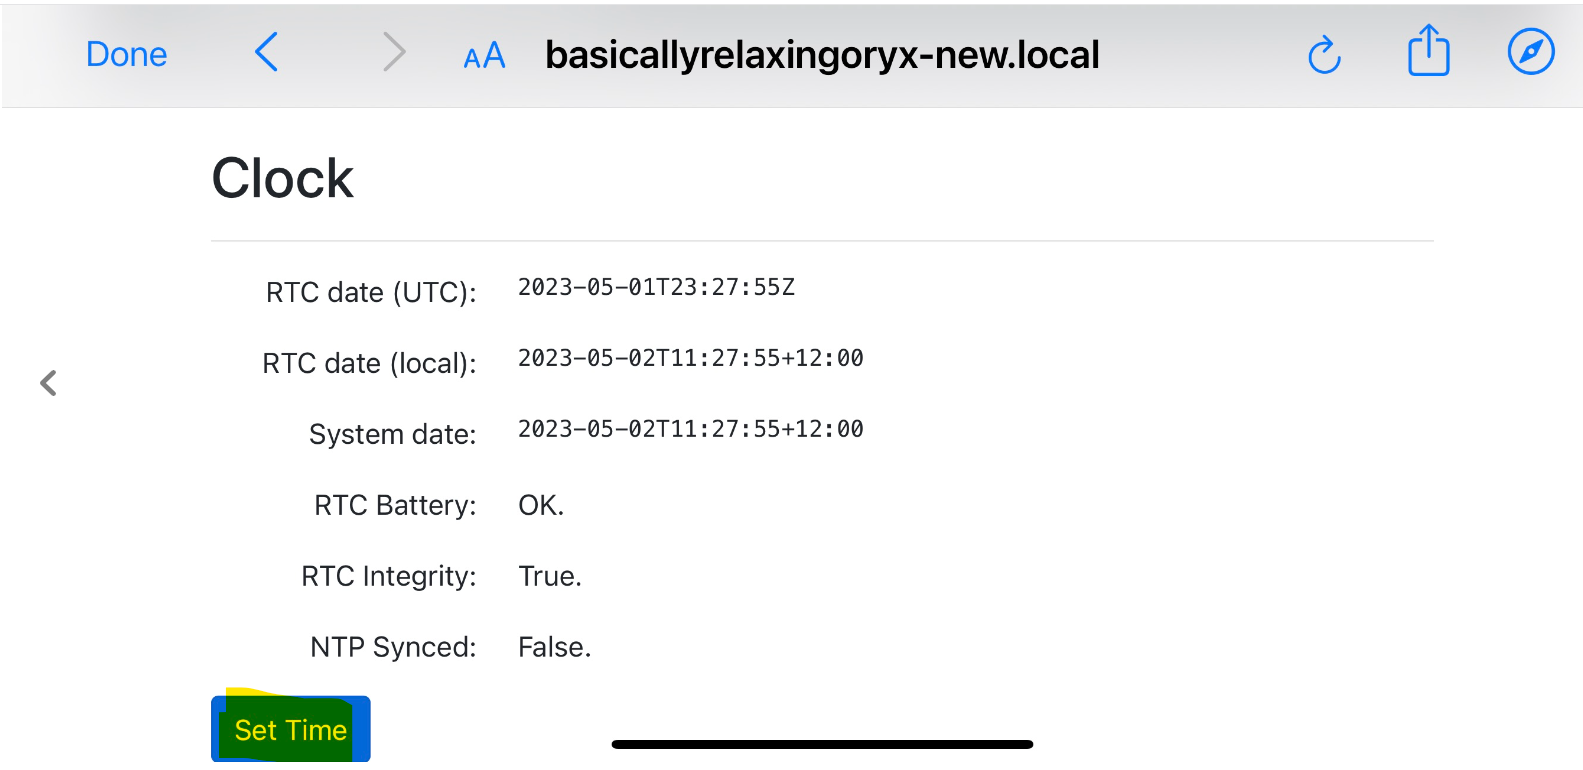
12.6 Camera recording at strange times
If your camera is recording at unexpected times this could be for the following reasons:
-
Your recording window has been set to a different time. See here for how to change your recording window.
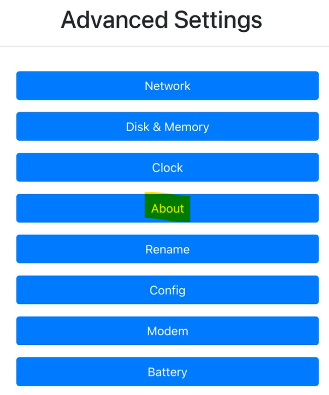
You can check the time and update it manually by going to General Tab, clicking Advanced, Clock and pressing the set time button. This will set the time to using the time on your phone.

12.7 Modem not working
If your modem is not working in your camera check the following:
-
The SIM is in correctly - it is easy to put it in backwards
13 FAQs
13.1 Can I export the data to a spreadsheet?
Yes - this is explained in 7.5 Analysing your data
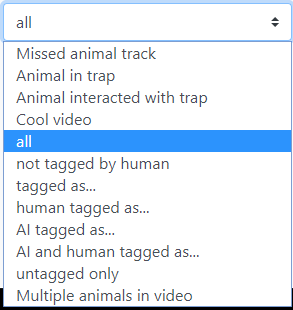
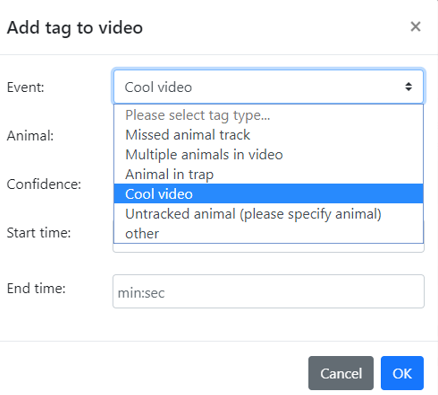
13.2 Can I tag a video as interesting?
Yes -click the add tag button at the bottom of the screen when you are watching a video

In the pop up you can mark it as a “Cool Video” and you can search by this tag to easily find the video again
13.3 Could my batteries catch fire?
The more expensive batteries we supply are lithium iron phosphate (LiFePO4). These are significantly safer than conventional lithium ion (Li-ion) batteries. The cells are incombustible, more stable and the phosphate based cathode material will not burn. You can see more information here https://www.newcastlesys.com/blog/lithium-ion-vs-lithium-iron-batteries.
The recycled Lime scooter batteries are lithium ion and there are risks with these batteries. This guide gives you some recommendations to reduce these risks: https://www.tek.com/en/documents/technical-brief/lithium-ion-battery-maintenance-guidelines
13.4 I forgot to update the location - can I change this later?
Good question. You can’t do this at the moment for recordings that have already been made. If you would like to do this then please let us know: support@2040.co.nz.
13.5 My camera rattles - is it okay?
No. Your camera shouldn’t rattle. If it does please contact us.
13.6 What is the clicking I hear?
Occasionally when you power up the camera you will hear a faint clicking sound. This is normal. The sound made by the thermal camera and opening and closing its shutter during auto-calibration.
13.7 How do I charge the battery?
Plug in the battery into the charger. The light on the charger will be red when charging, green when charged.
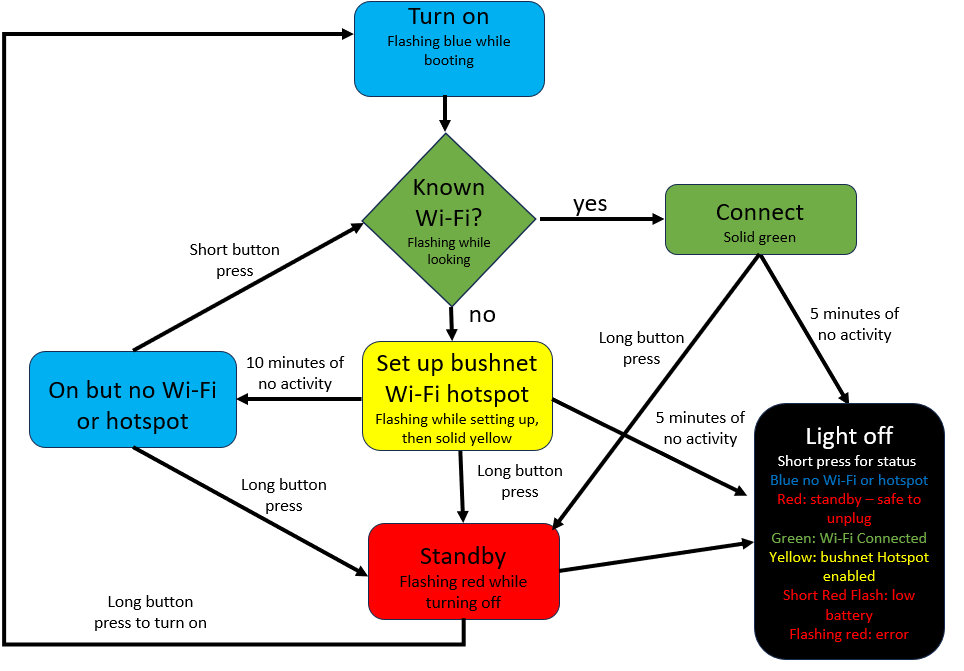
13.9 What do the colours of the light mean?
You can press the button on the camera to show the current status of the camera. This will show for 5 minutes and then the light will go off
-
Blue starting dim and getting brighter (sawtooth wave of period 2s): turning on, or rebooting.
-
Red Starting bright and getting dim (sawtooth wave of period 2s): turning off.
-
Solid RED: Off (Safe to unplug)
-
Blinking Green: Looking for a wifi network
-
Solid Green: Connected to wifi.
-
Blinking Yellow: Starting a hotspot.
-
Yellow: Hosting a bushnet hotspot
-
Blue: On with no connection
-
Short red flash then off: Low battery
-
Blinking red: Number of red blinks between pause indicated error code.
13.10 Can I connect to the camera with an iPhone?
Yes - we now have an iOS app that you can download here.
13.11 Testing the modem
To test the modem
See section 4.8.1 for instructions on how to test the modem
13.12 Can I change the recording time?
You can change the recording time under the camera tab.
The default is recording at night: 30 minutes before sunrise to 30 minutes after sunset. This is based on the location of the camera and the time of the year. The next most common configuration is to have the camera operating 24 hours/day. Or you can have the camera come on and off at custom times
13.13 How do I manage my camera batteries?
Your battery should last about 2 weeks if you are recording just at night in high power mode or about 2 months in low power mode. This will vary depending on the length of the nights and how many recordings it makes.
If your camera is connected to the internet then it is regularly connecting to the Cacophony servers and you will get an email alert when it stops connecting, informing you that the battery may be flat. This alert only goes to the Group Admins.
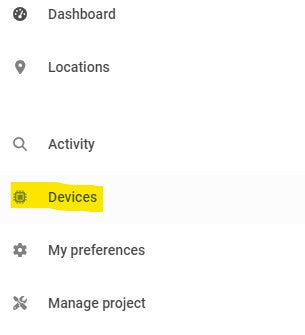
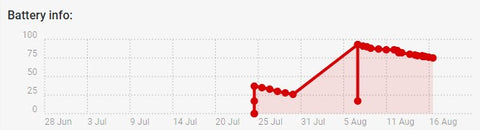
You can also see the current and historic battery voltage on the new version of browse: https://browse-next.cacophony.org.nz/. To see this, click on devices on the left hand side and then select your camera. The battery graph is on this page.
13.14 How do I reset my password?
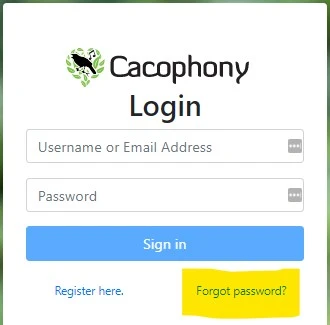
If you’ve forgotten your password or just want to change it click on the Forgot Password link on the Login screen
13.15 Why do I get an email titled “Stopped Devices”?
When your camera is connected to the internet it sends a “heartbeat” message to the server every 4 hours saying that it is alive and when it is going to send its next heartbeat. If the camera is scheduled to power off within the next 5 hours then it will send a heartbeat one hour before the power-off. If the server doesn’t receive the heartbeat within an hour of when it is expected then it sends an email to the group admins with the title: Stopped Devices with the following message.
Stopped Devices [Date/time]
[Camera name-Group name] id: [id number] has stopped, received last message at [date/time] expected to hear again at [Date time]
This normally means that the battery is flat and should be replaced. However it can occur if you power up the camera when it has an internet connection and then move it to somewhere where there is no connection. If you have just put a camera out in an area where there is no connection, then you should ignore this email.
13.15 Can I change my display name?
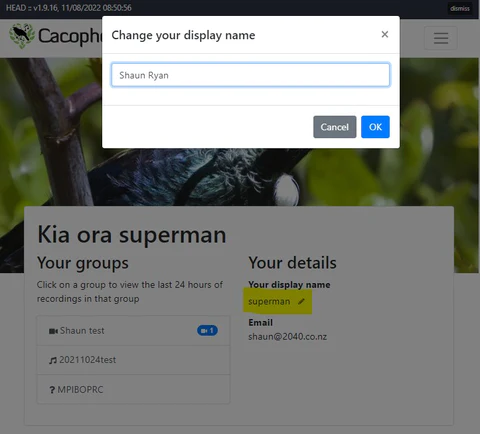
You can change your display name by clicking on the edit icon Edit icon by your current display name on the browse home page. This name will be shown in the tagging info - if you have added any tags, or in the list of users for a group.
13.16 How to navigate to a station page
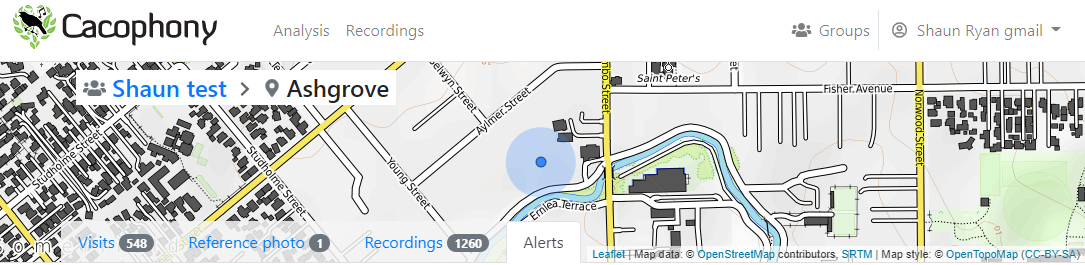
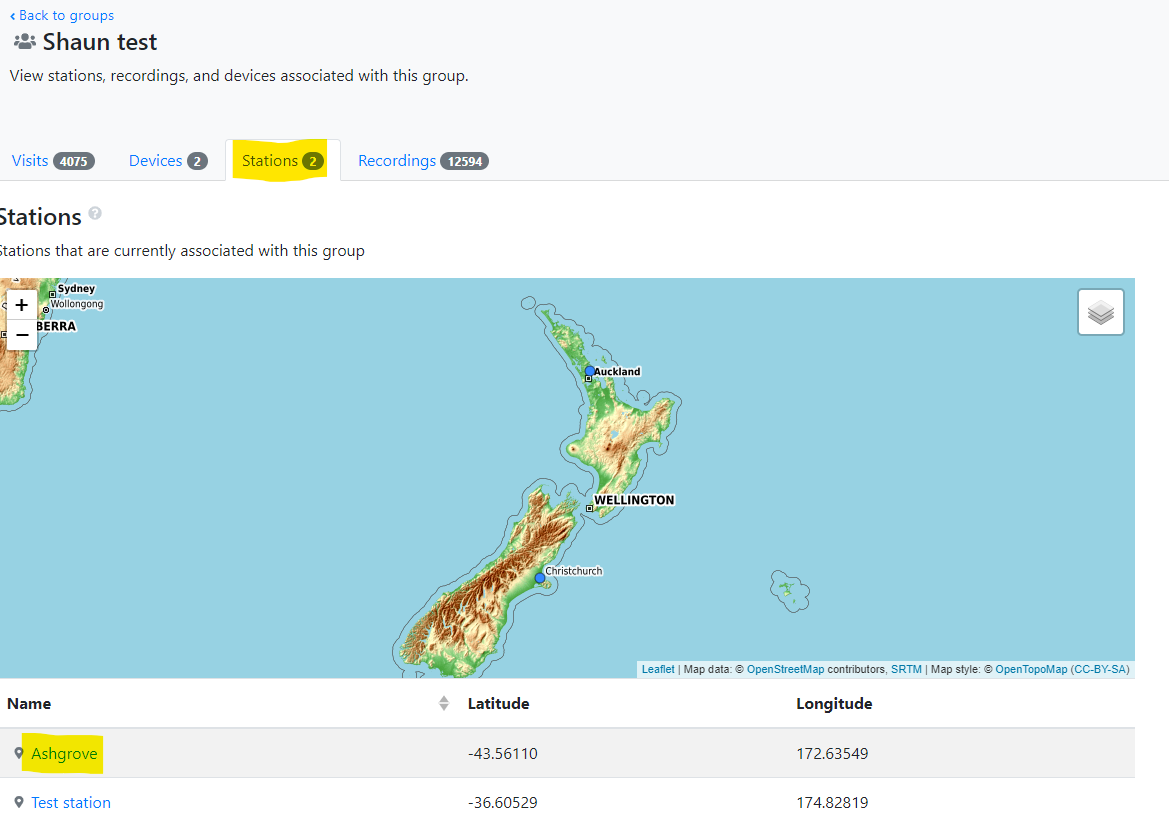
A station is a particular location where recordings have been made. The station page includes a map showing the location and tabs allowing you to see visits, recordings, change the reference photo and manage alerts. On a mobile device the tabs are accessed via a drop down.

To navigate to a station page you can click on the station name next to the :
-
on the list of recordings
-
At the top of a video
-
On the stations tab on the group page

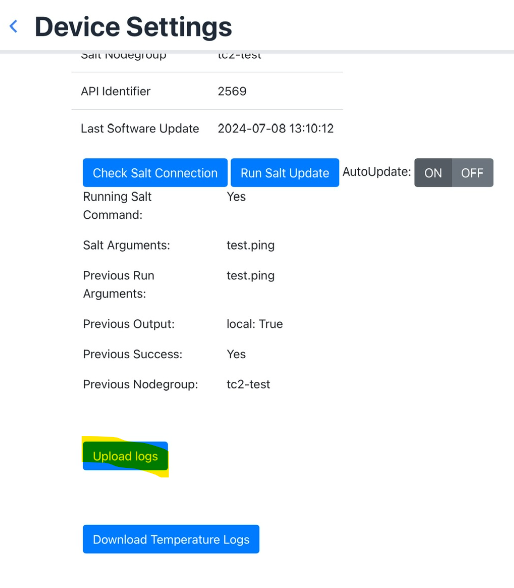
13.17 How to upload the logs
Occasionally, if an engineer needs to diagnose what is happening on your camera, we will ask you to upload the logs from the camera to our servers. To do this the camera needs to be connected to the internet (via a WiFi, or if the camera has a SIM card with a connection).
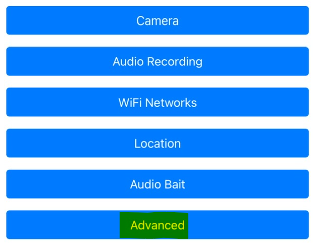
Connect the camera to your phone using Sidekick and open the general tab. Click on the Advanced link. Then click on the Advanced blue button, followed by the About blue button. Scroll down and click on the Upload Logs.

13.18 What is the algorithm for calculating a visit?
A visit is calculated using a clustering algorithm, gathering all recordings together in a location that happen within ten minutes of each other (this is somewhat arbitrary).
For instance, if a recording happens 9 minutes and 30 seconds after the end of a previous recording, it extends that visit window and counts towards the same visit. If another recording happens 10 minutes and 10 seconds after that recording ends, it will be counted as the beginning of a new visit.
That's what happens when all the classifications are automatically tagged by the AI.When people start confirming/correcting tags in a visit, it can potentially be split into multiple visits in the case where there really were more than one species of animal present within a given 10 minute window.
13.19 My SIM card isn’t working
There are a number of reasons why a SIM card might be working. The most common things to check are:
-
That the SIM card has data
-
That the SIM card is inserted correctly
-
That there is mobile data coverage for your data provider at the location where the camera is located.
Some of the less common things are:
-
Your mobile provider may require that an APN is set. This is set on the network tab, by pressing the cog icon. Common settings to try are internet and m2m.
-
We’ve seen 2 degrees SIMs stop working when the data carries over on a regular data, call and text plan. This was remedied by purchasing a purre data package.
-
We’ve seen Spark SIMs not work on 40GB Corporate Endless Data Only Plan, but will work when the plan was changed to 40GB Corporate Endless Plan.
If your SIM isn’t working please try asking your provider about why this is the case. We are happy to talk to them if needed.
13.20 When are recordings uploaded in low power mode?
In 24 hour mode the recordings will be uploaded 24 hours after the camera was last on, or earlier if the low power storage fills up.
In the default mode, or if you have a custom recording window then they'll be uploaded at the end of the recording window, or earlier if the low power storage fills up.